Crafty Collaborations
Crafty Collaborations is composed of Stampin’ Up! demonstrators from around the world. Each month we participate in multiple collaborative projects including blog hops, like this one, tutorials, and swaps to inspire all of us in our passion for crafting. Our goal is to create, share, and inspire every crafter to keep our creative energy flowing.
Crafty Collaborations is composed of Stampin’ Up! demonstrators from around the world. Each month we participate in multiple collaborative projects including blog hops, like this one, tutorials, and swaps to inspire all of us in our passion for crafting. Our goal is to create, share, and inspire every crafter to keep our creative energy flowing.
TodAy’s Project – Alcohol Inks & Vellum
I’ve been wanting to play around with using alcohol inks & vellum. It’s a very cool technique to make backgrounds. And, as I found out, it’s super simple. Over the next week, I’ll be sharing cards that I made using this technique. But for today, we’ll stick to just one.
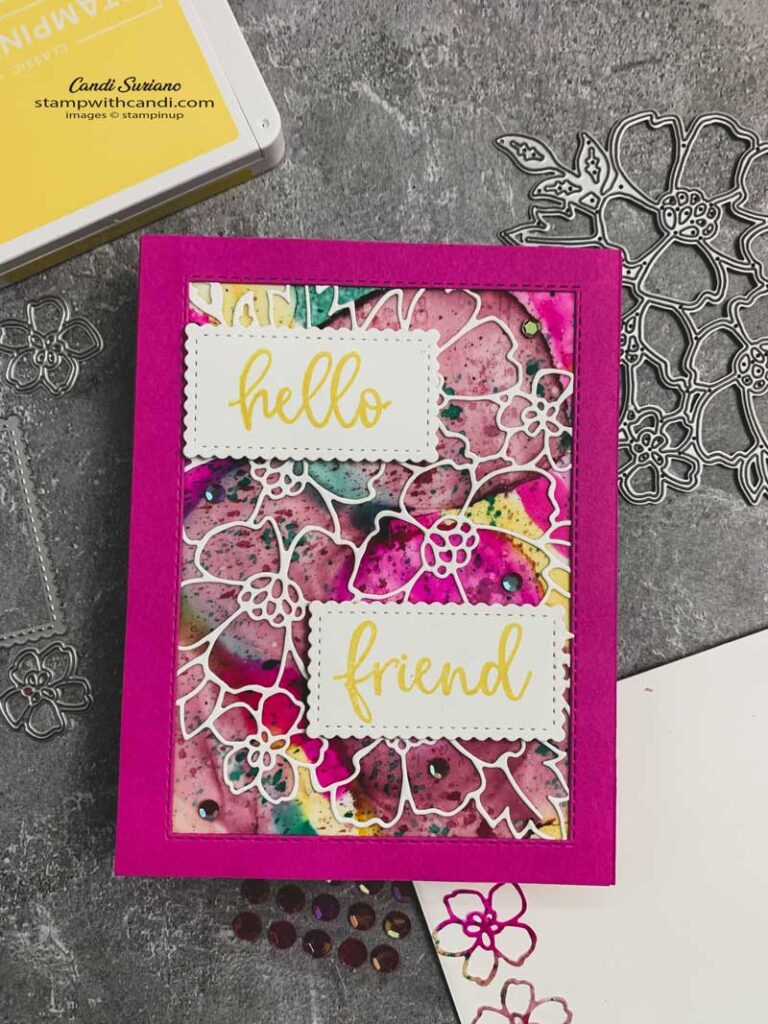
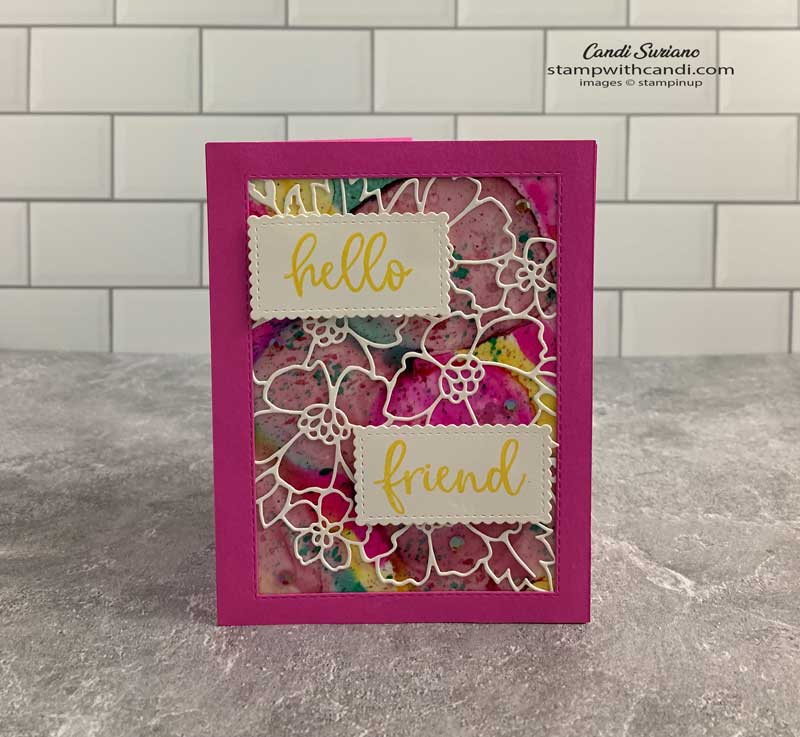
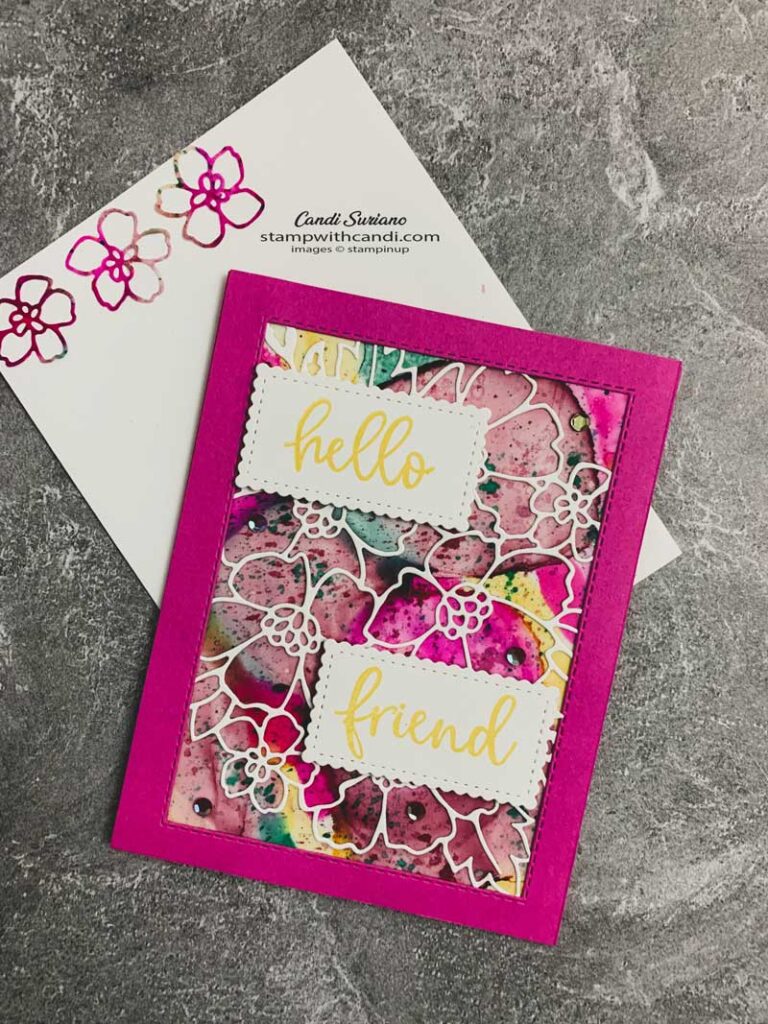
There’s a lot going on with this card, so let’s start with the background. I cut a piece of vellum at 4″ X 5 1/4″. Then, I scribbled blobs of ink using Dark Daffodil Delight, Dark Blackberry Bliss, Dark Magenta Madness, and Dark Bermuda Bay Blend. Next, I used a spritzer filled with 90% Rubbing Alcohol. The number on the alcohol is really, really important. It has to be 90% or greater. You can’t use the ordinary stuff because it doesn’t allow the inks to spread.
Once you spritz it, the ink immediately starts moving around. If you want to corral it a little, use one of the water painters dipped in some of the alcohol to move the color around. For a more subtle change, blow on it through a straw. Let it dry before going to the next step. And, don’t be surprised when the vellum curls!
After it dries, I flicked drops of Wink of Stella on it (thanks Patty Bennet https://pattystamps.com). I also flicked it with the blends. Once it dries you have a beautiful background to use on a card.
After it dried, I uncurled it and attached an adhesive sheet because I wanted a strong bond between the vellum and the Basic White layer I was putting it on. I attached the Basic White layer to my Polished Pink card base.
I attached a die-cut from the Many Layered Blossoms dies. Next, I cut a ‘frame’ using a Stitched Shape rectangle. I thought about popping it up using the adhesive strips but kept it simple. I wanted a frame because it looks nice, but also because the edges of the vellum were a little rough and I wanted to hide them!
The sentiment was stamped using Daffodil Delight ink and cut out using the Stitched so sweetly dies. I finished the front using some sequins from the Artistry Blooms embellishments.
Today’s Color Palette
I just love these colors. They are so bright and cheery and they are perfect for summer!
Make The Inside Pretty
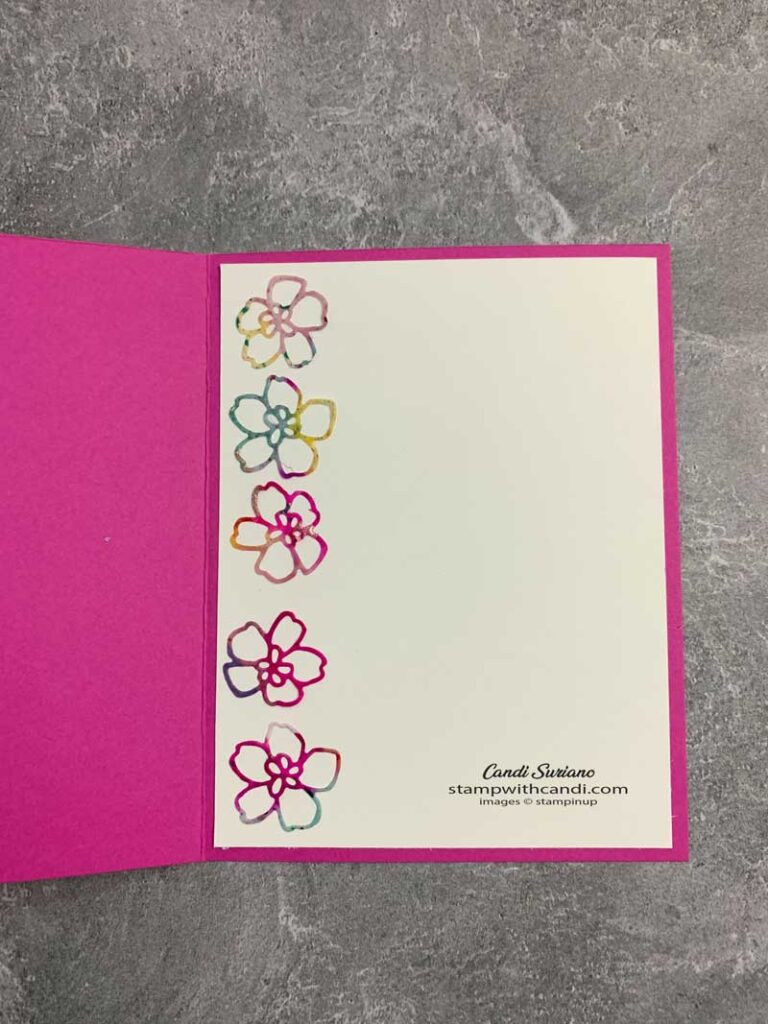
I had a few sheets of vellum left over, so I die-cut the flowers from the Many Layered Blossoms dies and glued them to the inside. I think you can really see the color variations looking at this.
Don’t Forget the envelope
For the envelope, I added 3 die-cut flowers up the side. I’m not sure they’ll withstand the mail, but I think this is a card I would hand delliver!
Now it’s time for some more collaborative fun. Grab a beverage, sit back and enjoy the hop! You should find some awesome ideas and inspiration as others share their projects made with the Waves of the Ocean suite.
If you’d like to try to recreate this card, you can find a list of the products I used at the end of this post. Need a demonstrator or a catalog? Drop me a line and I’ll put one in the mail. And, f you ever have any questions, please feel free to comment or email me. And, don’t forget to Pin this post so you can find it again!


Very pretty x
Beautiful! I need to try this technique! Thanks for sharing
Beautiful card!
Stunning card Candi, the inked background is so vibrant x
Beautiful card, Candi.