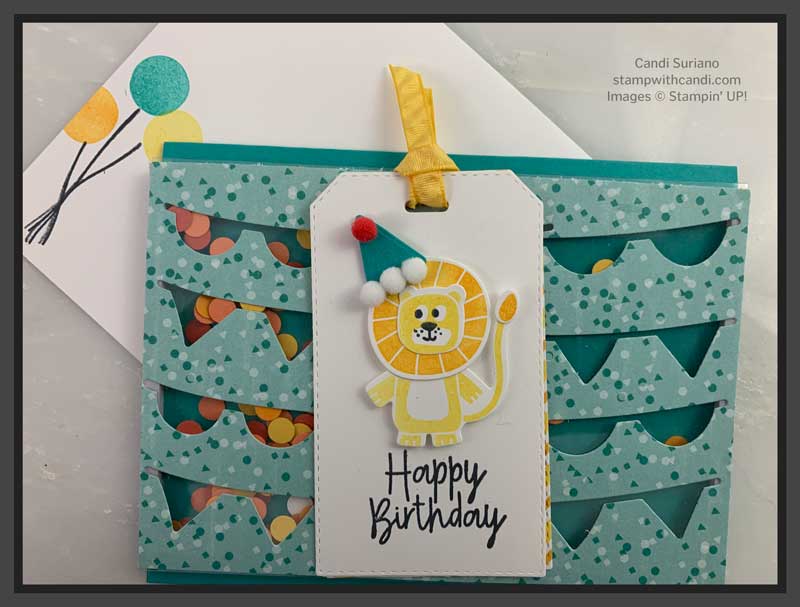
I was intrigued by the Stampin’ Up! Birthday Bonanza Shaker card so I just had to recreate it. I may have mentioned that my grandson loves shaker cards. So I’m always on the lookout for new ideas. Take a look.
Today’s Project
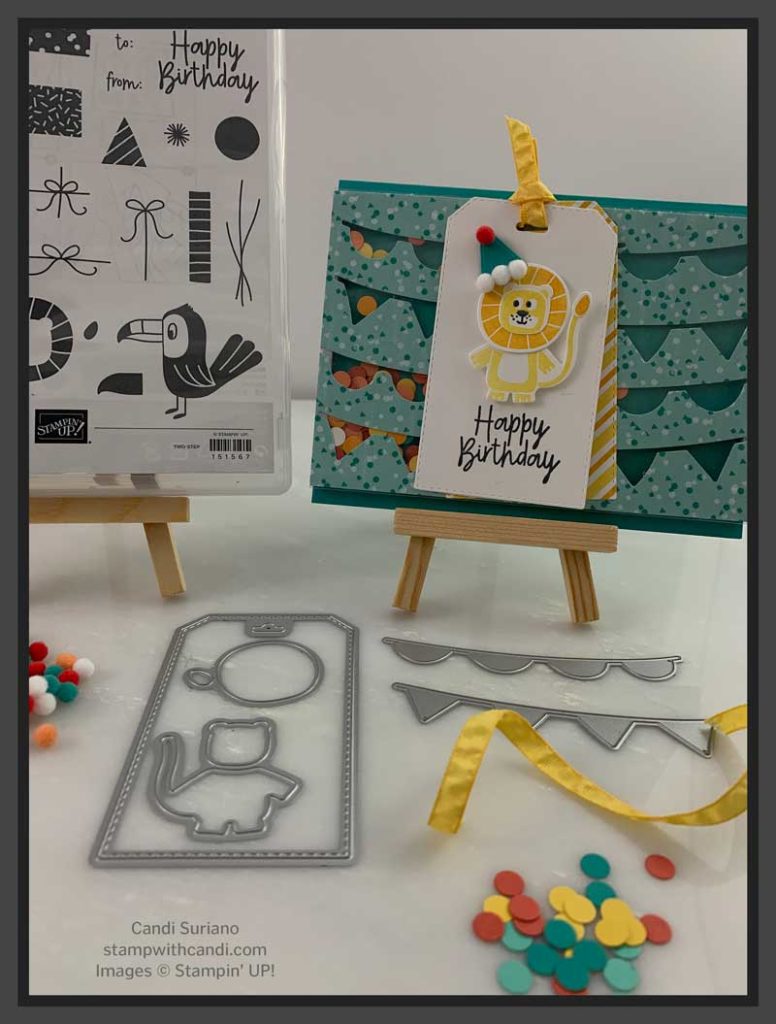
If you take a closer look at the card, you can see that I used the banners to cut openings on the front of the card. Then I glued down a clear acetate sheet aka window sheet, used long foam adhesive strips to make the holder for the shaker bits, added the bits and then, glued it to the back. It sounds a lot more complicated than it is. If you follow my recipe at the end of the post, you’ll see just how easy it is.
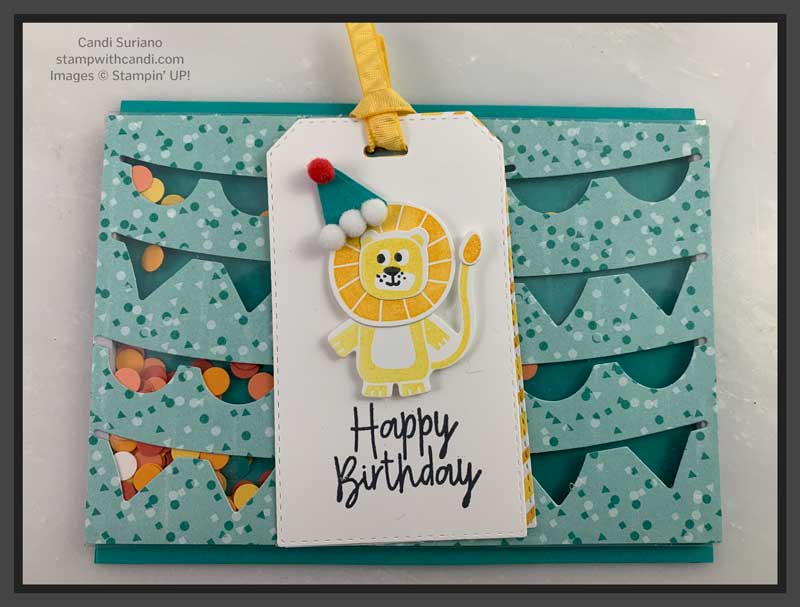
As you can see from the picture above, the banner dies do not go the width of the card. That’s where that cute lion tag comes in. It’s covering the very ugly crossover where the two dies meet in the middle! How clever of the Stampin’ Up! concept artist to disguise it that way.
To create the confetti to fill the shaker, I took a hole punch and punched out circles of Daffodil Delight, Terracotta Tile, Bermuda Bay, Whisper White, and Mango Melody cardstock. In the Stampin’ Up! version, the artist cut triangles. And, they both look good because both shapes appear in the DSP (Designer Series Paper).
I love the pompom detail on the hat. It makes the card just a little more festive. I also cut two tags – one from Whisper White to stamp on and another from the Birthday Bonanza DSP to back it up, add a little more color, and to glue it to the card front so that you can’t see the seam and the tag can swing around. The Daffodil Delight Ruched ribbon adds a little more color to the front. This is a very cheerful happy birthday!
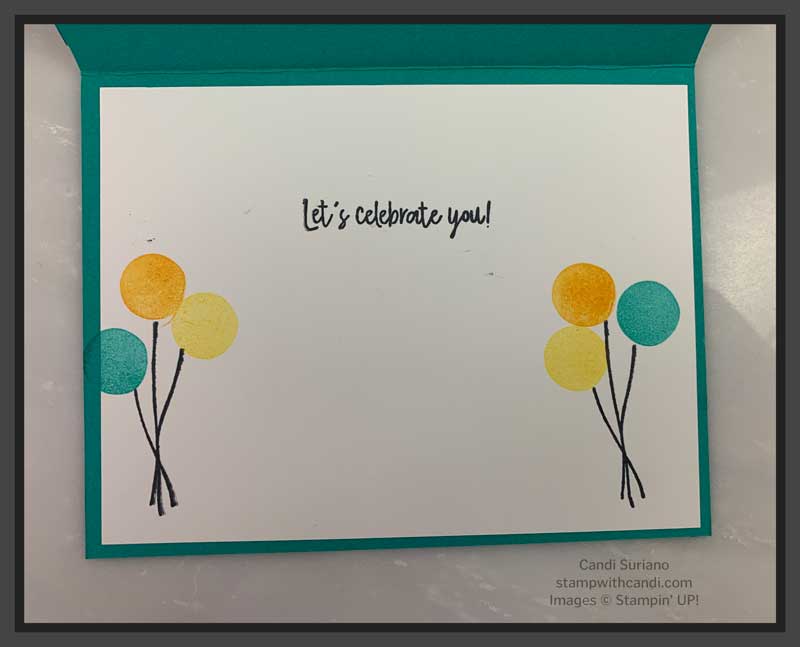
Make the Inside Pretty
For the inside, I stamped 3 balloons on each side of the bottom of the card. The strings were stamped first in Tuxedo Momento Black ink. And then I stamped the balloons in Bermuda Bay, Daffodil Delight, and Mango Melody. I also used the ‘Let’s Celebrate You’ sentiment stamped in Tuxedo Black ink. Oops. You can see I’ve got a couple of smudges. So, before I use this card, I’ll attach a few (5) pieces of confetti to this card. 2 pieces will cover the smudges and the others will just look like accents. Problem solved!
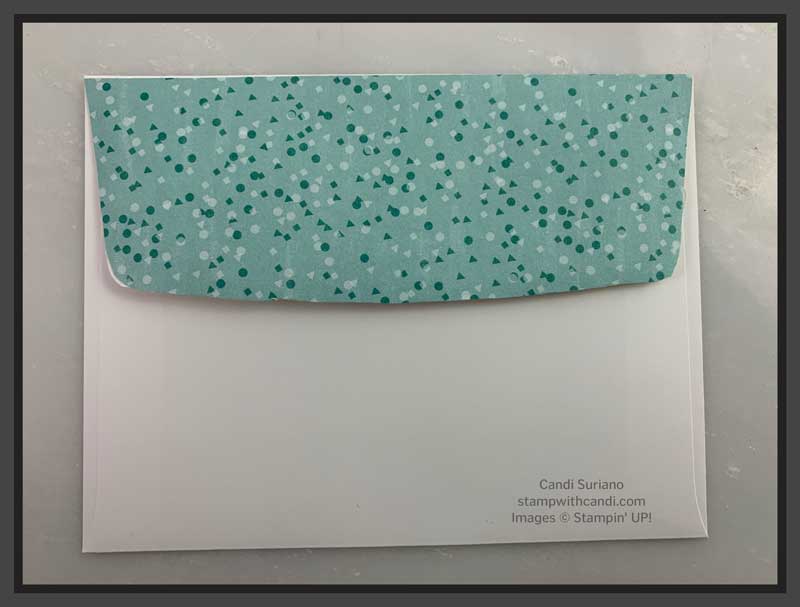
Don’t Forget the Envelope
For this card, I did both the envelope front and the flap. I stamped the same balloons from the inside of the card on the envelope front. And then I took a piece of the matching DSP, glued it on the flap and trimmed it to fit. Here’s a picture of the flap.
Finally, I’ll leave you with one last look at the card and envelope. As you can see in the picture below, the balloons are also stamped on the front of the envelope.
If you’d like to make this card, the instructions are below. And, at the end of the post, you can find a list of the supplies I used. Clicking on any item will take you to my online store where you can purchase them.
I hope you enjoyed today’s card. If you don’t yet have a demonstrator, I’d love to be yours. If you ever have any questions or need a catalog, please feel free to comment or email me. And, don’t forget to Pin this post so you can find it again!


 Ruched Ribbon")