Today’s Blog Hop is all about 3D projects – one of my favorite things! I love to make little 3D items to give to friends. It just makes them smile. My project for today is a cute little box using the Butterfly Kisses DSP and the Build a Butterfly dies. The box was inspired by the fabulous Julie Gilson. She is one of my favorite inspirations for all kinds of 3D projects. Although, I also get inspiration from Stampin’ Up! dies. The new July-August 2022 Mini-Catalog has some cute little square boxes that I can’t wait to play with!
Today’s Project – Butterfly Kisses
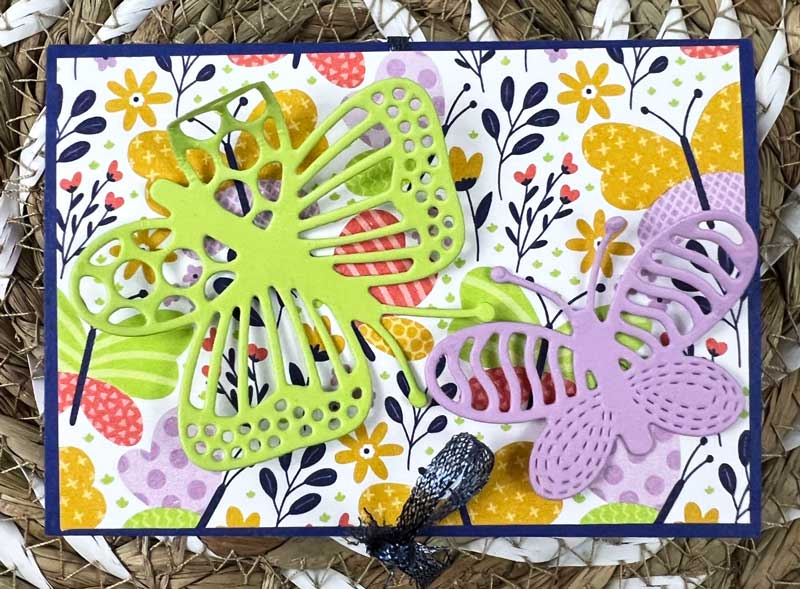
Isn’t this just the cutest little box? And I just love the bright colors. This image shows the box when it’s closed.
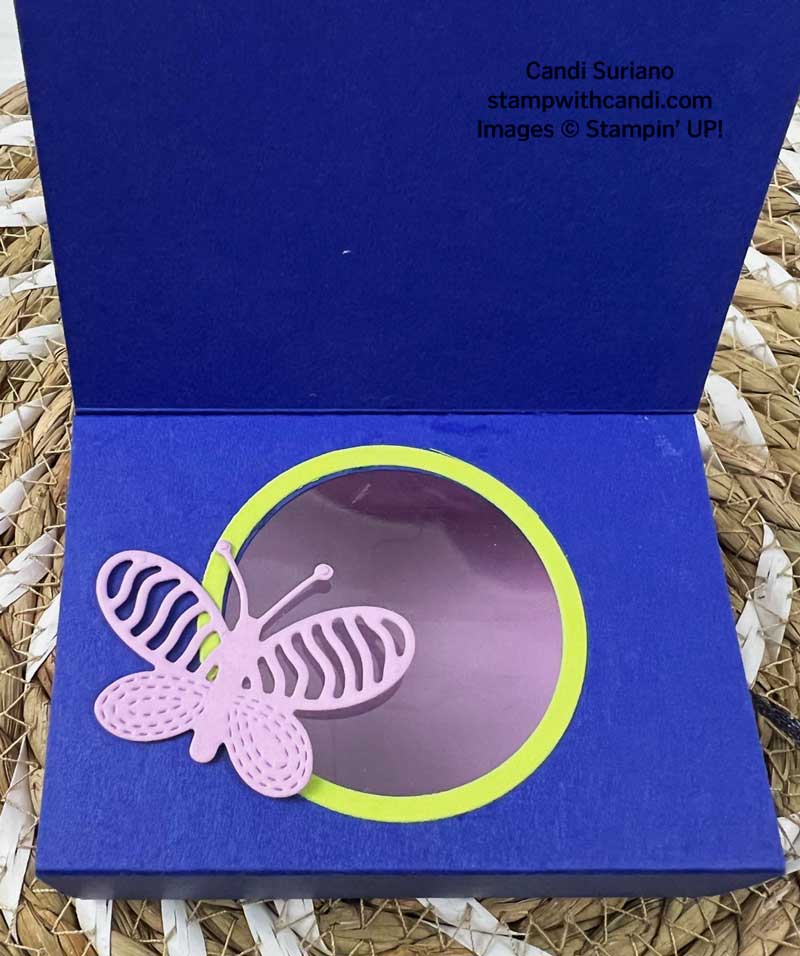
This image shows the box when the lid is open. Now, you’re probably wondering how you get your treats out of the box since the hole is covered by a window sheet!
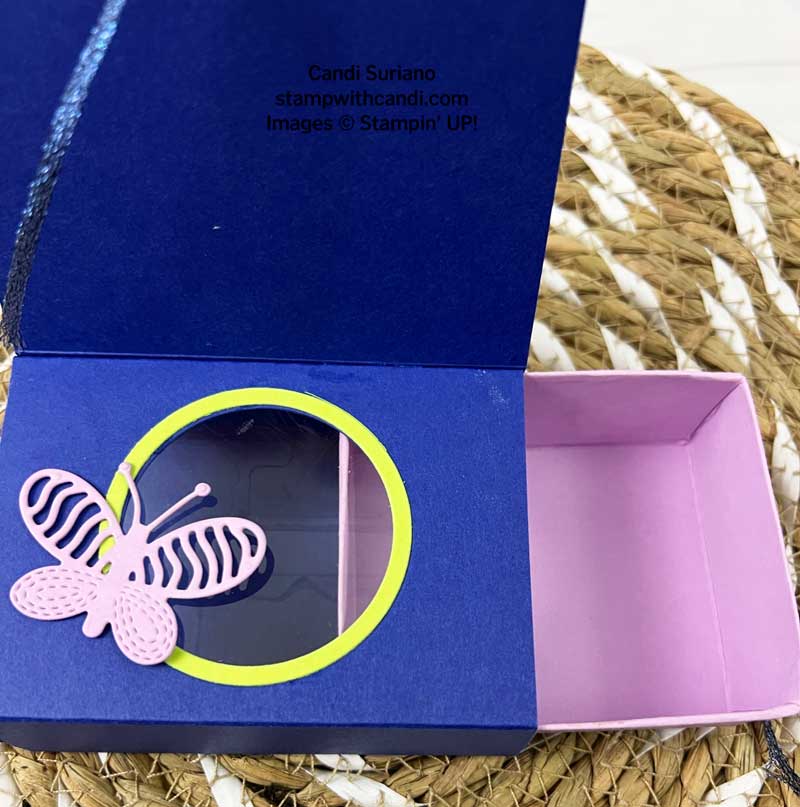
Finally, this image shows you the ‘trick’! There’s a box within the box. At one point the box was filled with a handful of Hershey’s kisses. And one night I had a chocolate craving! End of kisses.
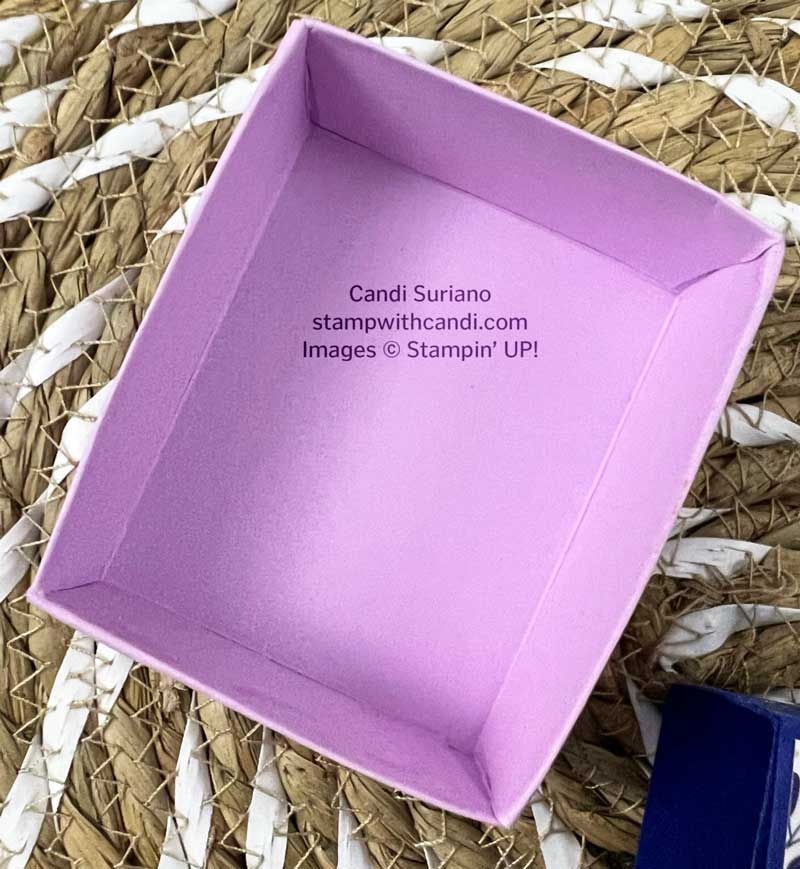
This image shows the interior of the inner box. The side walls are doubled to make it more sturdy.
tODAY’S cOLOR pALETTE – bUTTERFLY kISSES
I can’t seem to get enough of the new In Colors. They are so pretty together. And I especially love this combo of blue, green, and pink! But, the best part is I didn’t have to think about it. I took them directly from the Butterfly Kisses DSP!
You Can Make it too – Butterfly Kisses
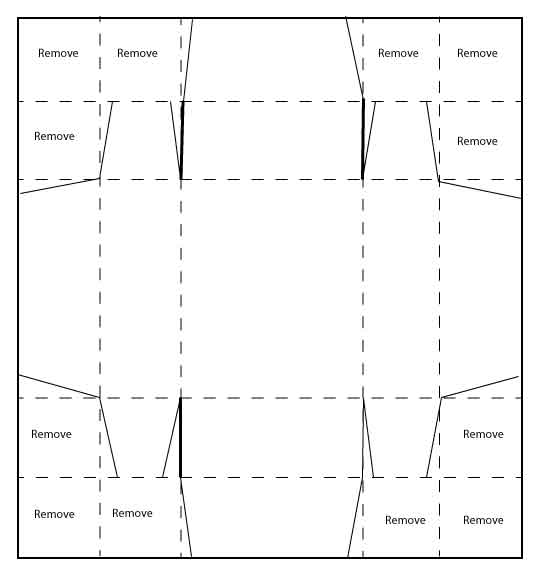
Inner Box
- Cut a piece of Fresh Freesia at 7″ X 7 1/2″.
- Score at 1 1/8″ and 2 1/4″ on all sides.
- Fold on all dashed lines.
- Remove the squares as labeled.
- Cut on the heavy lines.
- Notch the tabs on the lighter lines.
- Add adhesive to the small tabs and attach them to the adjacent side.
- Flip the box over.
- Add adhesive to the large tabs and fold them in. Burnish with a bone folder to get a tight seal.
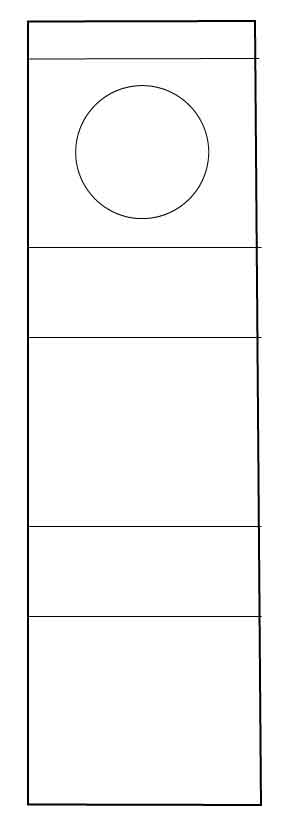
Outer Box
- Cut a piece of Starry Sky cardstock at 3 1/4″ x 10 7/8″.
- Score at 1/2″, 3 1/8″, 4 3/8″, 7″, 8 1/4″
- Cut a circle using the 4th largest Layering Circle die.
- Attach a piece of Window Sheet cut at 3″ X 2 1/4″ to the bottom of the circle.
- Fold on all the score lines.
- Glue the tab from the first score line to the edge of the last score line to form a box. Make sure the window sheet is on the inside.
Decorate
- Cut a 16″ piece of Starry Sky Metallic Ribbon.
- Attach the ribbon to the box top.
- Cut a piece of Butterfly Kisses DSP at 3 1/8″ X 2 1/2″. Attach to the box top.
- Cut two butterflies from the Build a Butterfly dies in coordinating colors to the DSP.
- Cut a frame using the 3rd largest and 4th largest layering circle dies in Parakeet Party.
- Attach the frame to the circle as shown in the image below.
- Cut a butterfly from the Build a Butterfly dies in a coordinating color.
I hope you enjoyed my cute little box. I’m thinking of making them for some of my coworkers now that I see them in person! Now it’s time to find more inspiration from the rest of the participants in today’s 3D project hop. So grab a beverage, sit back, and be ready to be WOWED by this hop!
The July-December mini catalog is available July 2! Want a copy, let me know by filling out a request here. I’ll be showing some teasers from the catalog in the upcoming week! And, it’s also Summer Sale-a-bration. I have to say, that I wanted absolutely everything in both catalogs. There are some fresh new ideas coming our way in July!



Love your project. Can’t wait to CASE
Very cute x
Great project Candi Thankyou x