Today Stamping with Friends has a blog hop with the theme Emboss Resist. It’s a technique where you emboss an image and then add color over top and around it. Then you take a tissue and wipe off the ink. The ink will stay on the cardstock but not on the embossed image.
Today’s Project – Emboss Resist
There is a version of Emboss Resist called Joseph’s Coat. In this version, You start with a base with a lot of colors which you may have put on with blending brushes. Then you stamp with Veramark ink and heat set. Then you cover the entire card with dark ink; Momento Tuxedo Black or Early Espresso are two common inks to use.
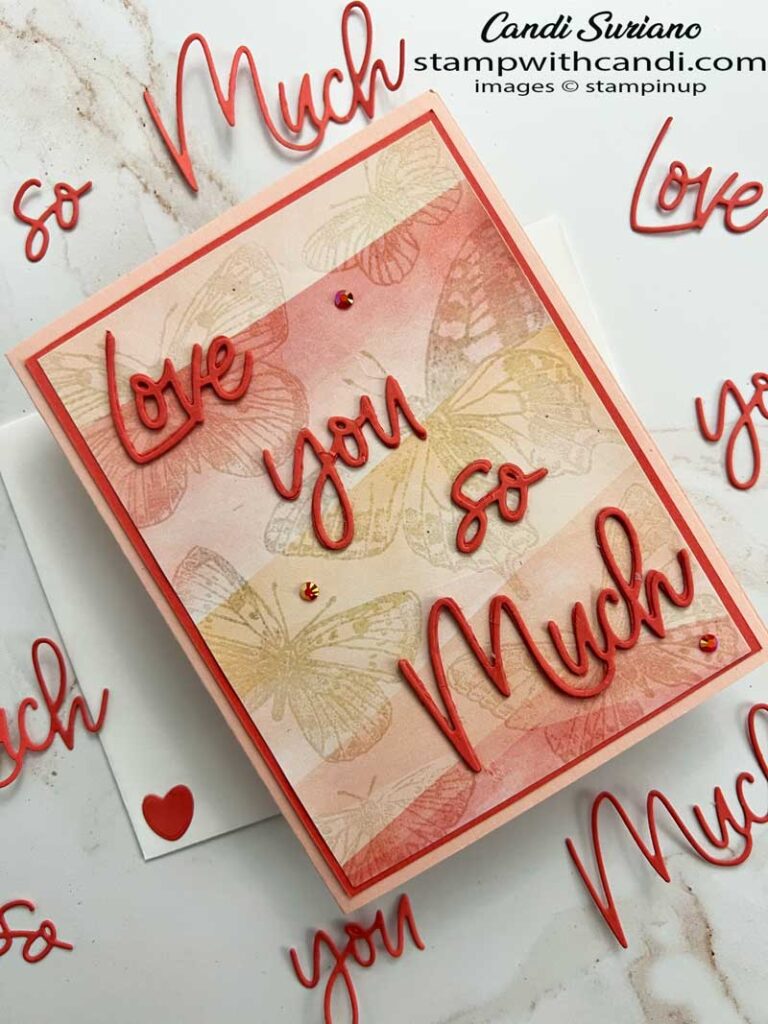
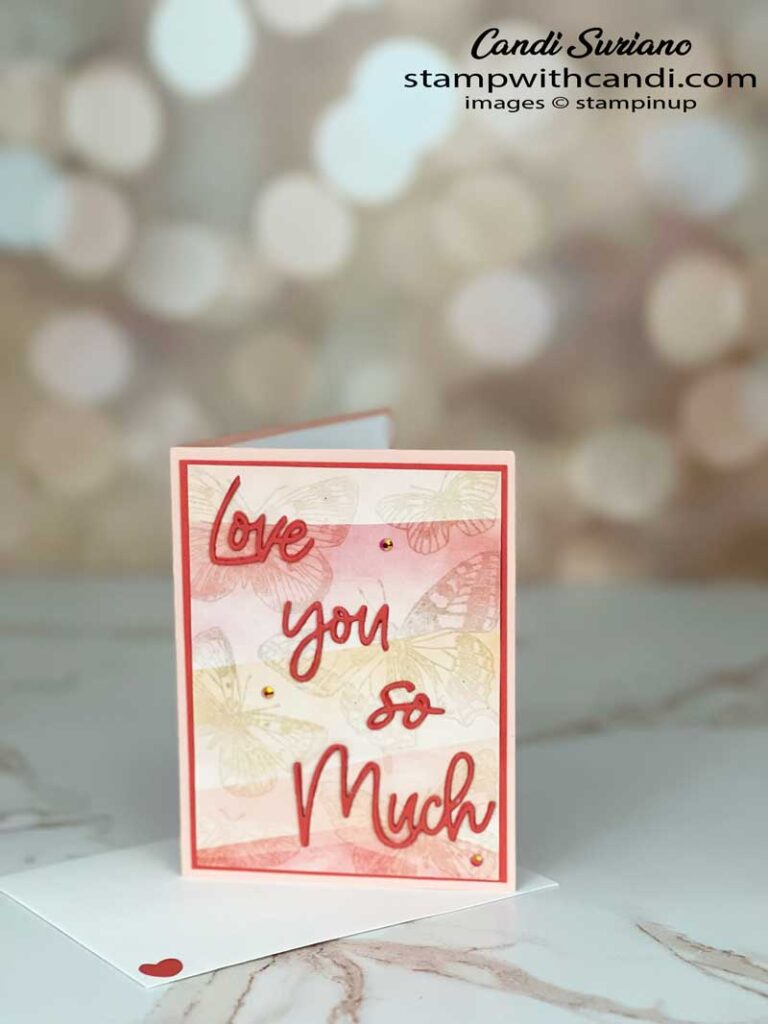
So I did a different version of Joseph’s Coat. I start with a piece of DSP from Delicate Desert DSP. Since I started with a colored base, no need to add additional color. Then I stamped Butterfly Brilliance on the DSP and embossed it with Clear embossing powder. But then, instead of using dark ink, I used Whisper White craft ink! So instead of getting high contrast, I got a subtle, more muted effect which is perfect for this card. One trick I learned with this is after you’re done wiping the Whisper White of the embossed images, hit them with the heat tool one more time. It makes the images pop a little more.
For the sentiment, I used the Love for You Dies. And the font on these dies is very skinny, so no way you’re going to get dimensionals on them. So, I did the same trick as my last blog post here and glued 3 of them together which gave me the dimension I wanted.
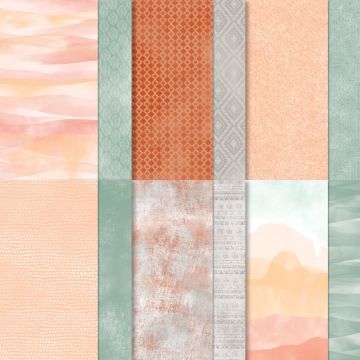
Delicate Desert DSP
This paper is gorgeous! It’s full of muted desert colors like the one I chose for this card. But, it also has some more saturated colors and some fabulous patterns. Even if you don’t like the rest of the suite you should still get this paper!
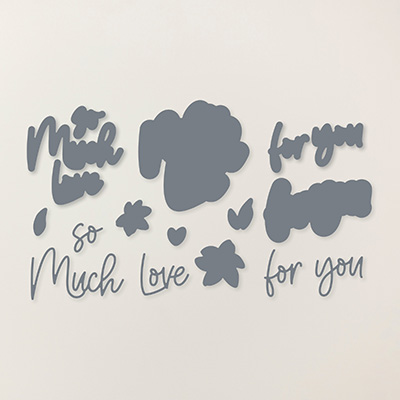
Love For You
So far, these are my favorite dies from the new mini that went live yesterday! I love the words and all the ways you can arrange them and how it also includes the shadow if that’s the look you want. I’d love a whole set of word dies like this! We had some a while back, but they weren’t as big or exuberant as these!
Today’s Color Palette
I pulled the color palette right from the DSP. I seem to be using the palette a lot lately. because 3 of the last 4 cards that I made use Calypso Coral and Petal Pink. And those are not usually ‘my’ colors. But they were perfect for this card.
Make the Inside Pretty – Emboss Resist
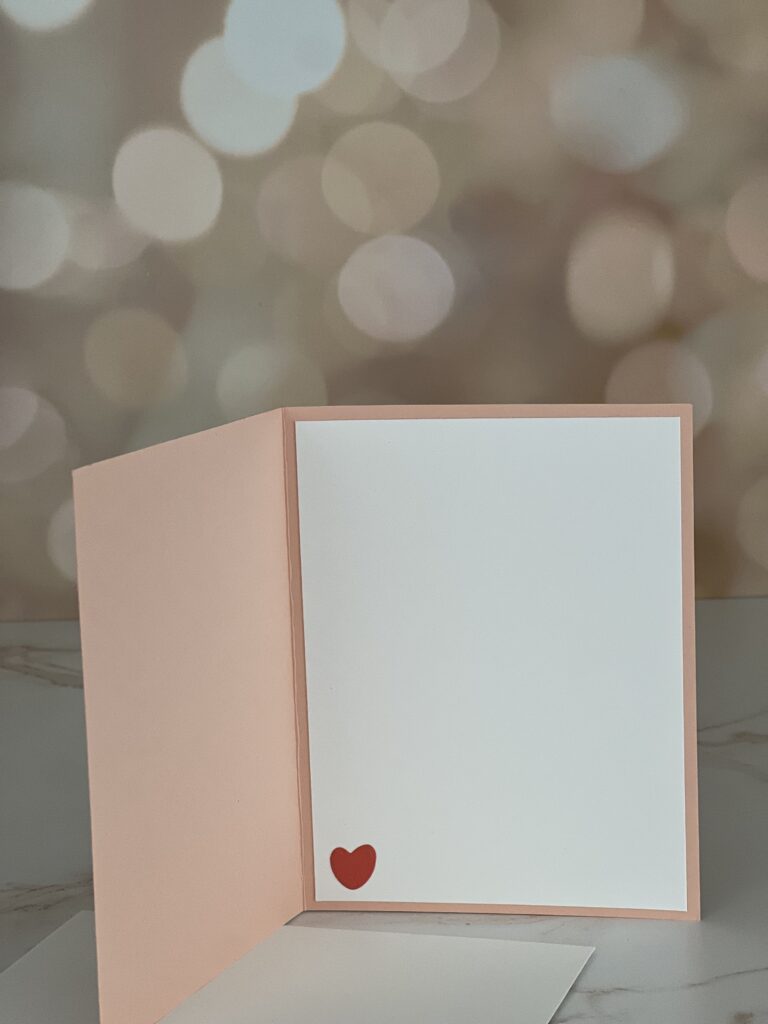
I was going to add DSP to the inside, but then I really wanted this to be an anniversary or Valentine’s card. So, to reinforce that, I added a heart. Somewhat funny story about the heart. I was searching all of my dies for a heart. And I couldn’t find one. So then I started looking through the mini for a heart. And I found it! It’s part of the same dies as the word on this card. It was nestled in another die and my eyes just skipped over it!
Don’t Forget the Envelope – Emboss Resist
You Can Make It, Too! – Emboss Resist
Today’s card is pretty easy. The only part that’s a little fiddly is gluing the words together. And, you could totally skip that step. The card would just be a little flatter.
Make the Cuts
- Cardbase (Petal Pink) – 5 1/2″ x 8 1/2″. Score at 4 1/4″.
- Layer 1 (Calypso Coral) – 5 1/4″ x 4″.
- Layer 2 (DSP) – 5 1/8″ x 3 7/8″.
- Inside liner (Basic White ) – 5 1/4″x 4″.
- Die cut pieces – (Calypso Coral) -5 1/4″x 4″.
Stamp and Emboss
- Use the Stamparatus to stamp this large background stamp.
- Lay the DSP on the Stamparatus.
- Put the stamp on the DSP.
- Grab the stamp with the clear plate.
- Rub the DSP with the Embossing Buddy to make sure there are no stray bits.
- Ink the stamp with Versamark ink.
- Sprinkle with clear Embossing powder. Heat set.
Die Cut
- Cut 3 each of the four words using the Love for You dies.
- Glue the words together using liquid glue.
- Die cut two small hearts out of a Calypso Coral scrap.
Do the Resist
- Rub Whisper White Craft ink all over the card front. You can use a blending brush, a sponge dauber, or a Stampin’ Spot inked with White Craft ink. I used the Stampin spot because it was faster to get the ink on the card front.
- After the Whisper White Craft ink has dried. Rub a tissue over the butterflies to remove the excess ink.
- Heat the butterflies one more time to get them to pop a little more.
Assemble
- Attach the embossed panel to the Calypso Coral panel.
- Attach Calypso Coral to the card front.
- Attach a small heart to the inside liner. Attach the liner to the inside of the card.
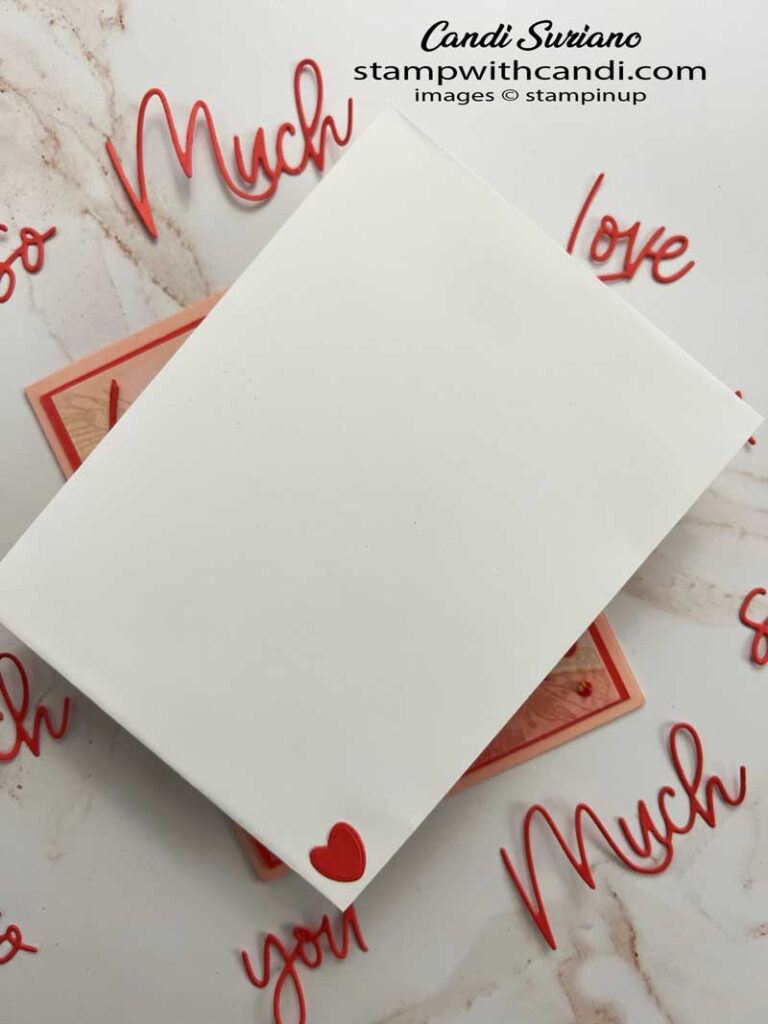
- Attach a small heart to the envelope front.
Time to Hop
I hope you enjoyed my card today and that it inspires you to try the Emboss Resist technique. You can use any stamp set for this technique. It doesn’t have to be a large background stamp. Now it’s time to see what the other Friends have for you. So, grab a beverage, sit back and relax, and enjoy the hop!
January 2023 PaperPumpkin – Key to My Heart
Subscribe by January 10 to get this cute & lovely Paper Pumpkin. This month’s kit includes:
Everything you need to make 9 cards, a love-themed stamp set, a Fresh Freesia Ink Spot, and a unique padlock and key die cuts. Plus there is an add-on item – 10 heart-shaped boxes for $11. Not a subscriber? Click this link to subscribe.
Can you imagine 44 step-by-step tutorials using current Stampin’ Up! products? And it’s yours for a $50 purchase in my online store! And, for the first 10 people who place an order, I will send you the supplies to make my project! It doesn’t get better than that!





Great card Candi, love your ombre ink blending x
Wonderful card design. Love the way you used the Craft White ink to create a soft and subtle background. So pretty.
Beautiful card
Great way to mix old with new. I love the butterflies.
Gorgeous Card Candi x