Hi everyone. Today I’m featuring the Ginkgo Branch Bundle for a Stamping with Friends blog hop. Stamping with Friends is a group of demonstrators all over the world that share their creations with you to spark your creativity. Today’s topic is your Favorite January-July Min Catalog product. Read on to see why I chose the Gingko Branch Bundle.
Today’s Project – Ginkgo Branch
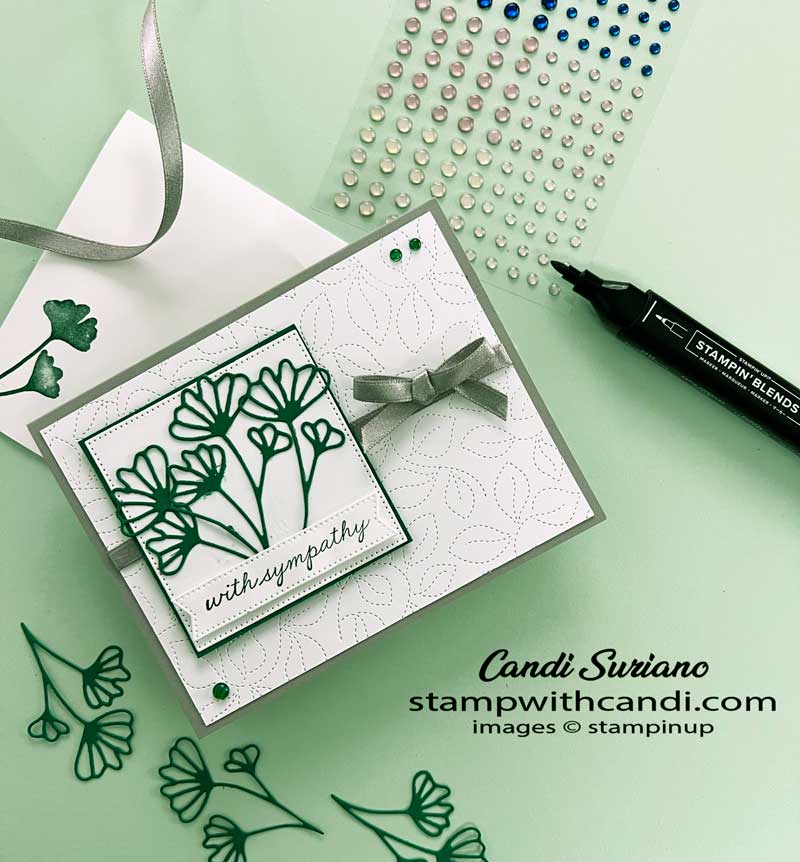
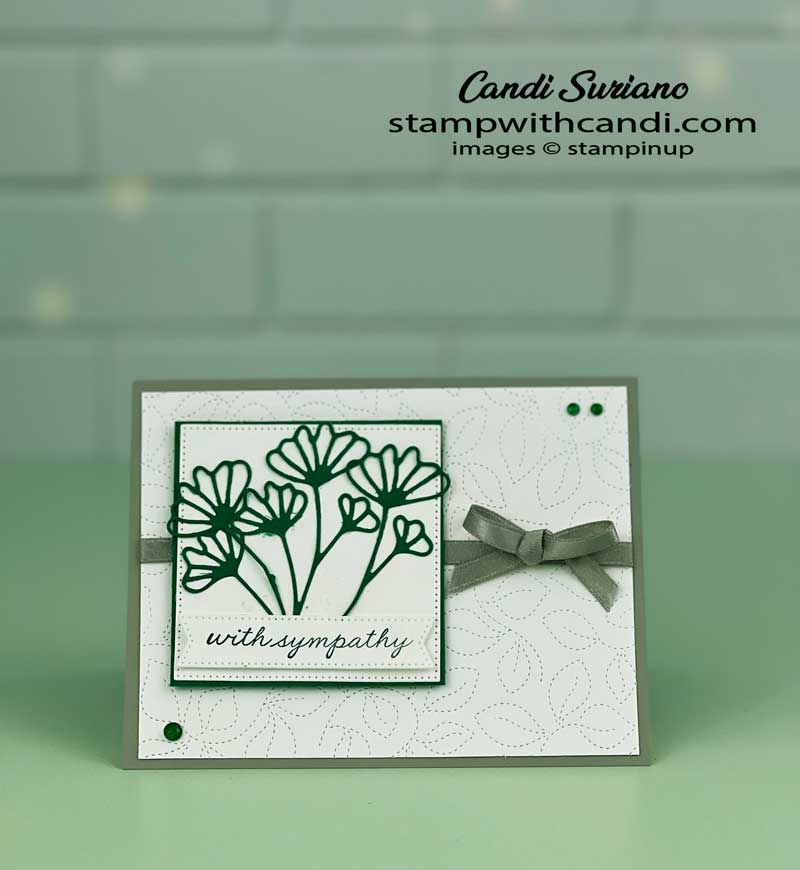
The card’s base is Gray Granite topped by a Basic White layer which was cut with the Stitched Greenery die. This die can be used like an embossing folder to give texture to the card front without overpowering it. Then I cut three leaves using the standalone leaves die. After trimming two of them I glued them to a Basic White square matted with a Shaded Spruce layer.
Before attaching the Basic White layer to the front, I added a Gray Granite Shimmer ribbon tied into a bow. Once the card was assembled, I added three Milky Dots colored with the BLUNT end of a Dark Shaded Spruce Blends.
Tody’s color Palette – GinKgo Branch
I knew I wanted to use Shaded Spruce because I didn’t want a mournful color. But then what to pair with it that also had a coordinating ribbon? So, I looked at my trusty color coach and it had Gray Granite as looking good with Shaded Spruce. Perfect for this card!
GingKo Branch Bundle
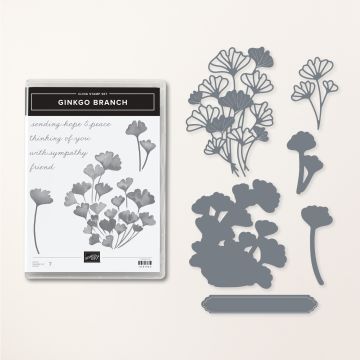
Everyone needs sympathy cards especially when you get to a certain age. The Ginkgo Branch bundle is perfect for sympathy cards. The elements are very serene and it has four perfect sentiments. “sending hope & peace”, “thinking of you”, “with sympathy”, and “friend” are included in a very pretty lowercase script font. And, you can make more than sympathy cards as the sentiments also can be used for friendship and support. Plus, the “friend’ sentiment can be tacked on the end of the other sentiments.
Make the Inside Pretty – Ginkgo Branch
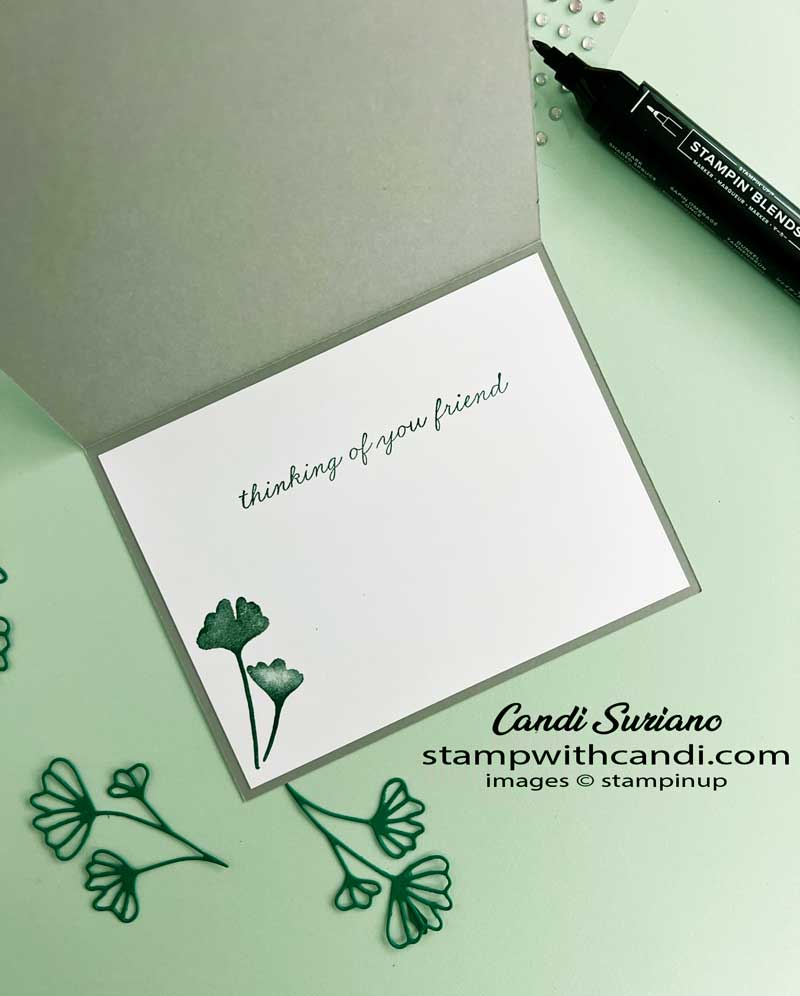
I stamped the small leaf in the lower left-hand corner of the inner Basic White panel. I also stamped two sentiments using Shaded Spruce ink.
Don’t Forget the Envelope – GinkGo Branch
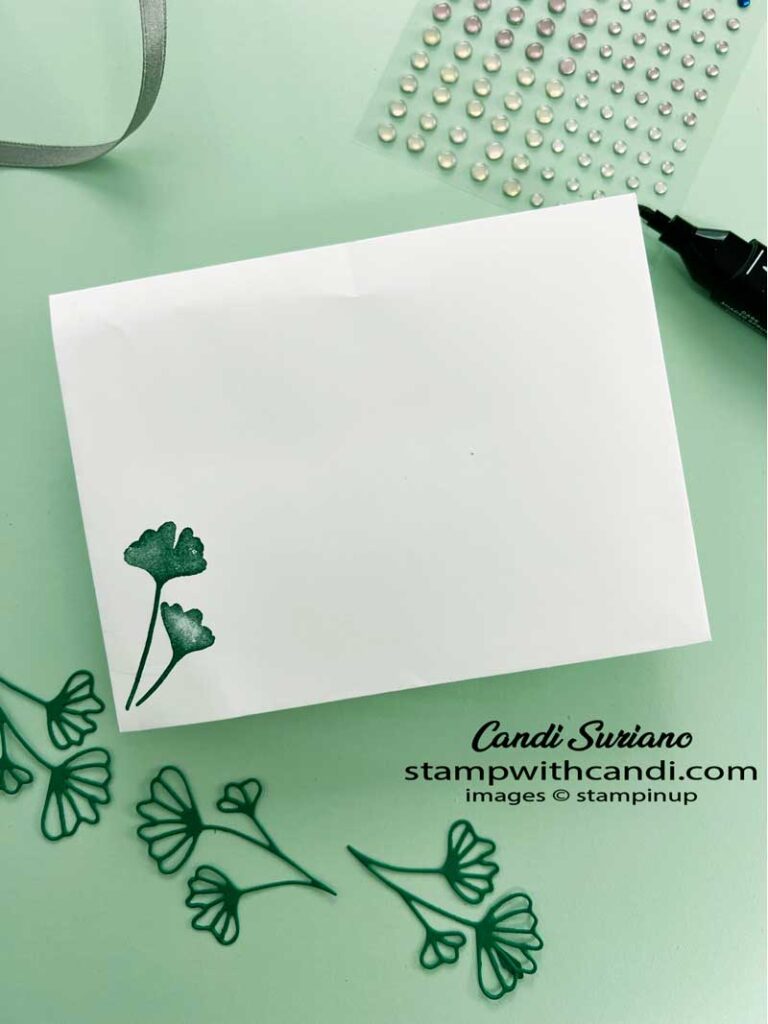
For the envelope, I stamped the smaller leaf on the left-hand corner of the envelop front.
You can Make it, Too! – Ginkgo Branch
Make the Cuts
- Cardbase (Gray Granite) 5 1/2″ x 8 1/2″. Score at 4 1/4″.
- Layer 1 (Basic White) 5 1/4″ x 4″.
- Layer 2 (Shaded Spruce) 2 3/8″ x 2 3/8″
- Layer 3 (Basic White – die cut) 3″ x 3″
- Inside layer (Basic White) 5 1/4″ x 4″
- Die cut leaves (Shaded Spruce) 4″ x 4″
- Scrap for sentiment (Basic White) 2 3/4″ x 3/4″
Stamping and Die-Cutting
- Stamp the sentiment on the Basic White scrap using Shaded Spruce ink. Die cut using Stitched Shapes die.
- Die cut the Shaded Spruce leaves using Gingko Branch dies.
- Die cut the Basic White layer using the 2nd largest Stitched Shapes dies.
- Die cut the Basic White first layer using the Stitched Greenery die.
- Stamp the smallest Gingko leaf on the envelope front’s lower left corner and the inner Basic White layer using Shaded Spruce ink.
- Color one large and two small clear Milky Dots with the BLUNT end of a Dark Shaded Spruce Blends.
- Stamp the inside sentiments on the inner Basic White layer using Shaded Spruce ink.
Assemble
- Fold the card base on the score line. Crease with a bone folder.
- Attach the inner Basic White layer to the inside of the card.
- Wrap a ribbon around the Basic White first layer and secure it on the back. Attach to the card front.
- Cut the rightmost leaf from one of the die cuts. Cut the leftmost leaf from a different die cut. Use liquid glue to attach the uncut die cut to the middle of the Basic White square Attac the other two die cuts on the left and right.
- Attach the Basic White square to the Shaded Spruce mat. Attach to card front using dimensionals.
- Attach the sentiment to the front using dimensionals.
- Tie a bow and attach it to the front.
- Attach the colored Milky Dots to the card front.
Time To Hop
I hope you enjoyed my sympathy card and are inspired to use the Ginkgo Branch Bundle. Now, it’s time to see what the other friends have for you. I know I can’t wait to see their favorites! So, grab a beverage, sit back and relax, and enjoy the hop!
Need a Demonstrator?
If you don’t have a Stampin’ Up! demonstrator, I’d love to be yours. If you need a catalog, click here or email me at candi@stampwithcandi.com and I’ll pop one in the mail for you.
Or, even better, join my team! As a demonstrator you’ll enjoy the following perks:
- 20% discount on all products
- Sneak peeks of new products such as the Irresistible Bloom bundle available to customers on March 1st.
- Access to the demonstrator website and the Demonstrator Planning Place – a Facebook group where you’ll get tons of ideas, inspiration, and encouragement.
- Be able to attend fun, fun, fun Stampin’ Up events.
- Make lots of new friends. I met many of my closest friends from Stampin’ Up!
- Free access to my tutorial library which has hundreds of projects to inspire you!
- Finally, it’s Sale-a-bration and the starter kit special is unbelievable. Get $175 of products for $99 dollars and free shipping which is 11%. OR get $175 of products plus either a Basic White or a Boho Blue Mini Stamin’ Cut & Emboss for $129.
- Personalized coaching to help you reach your goals.
- You can try it to see if you like it. After purchasing the starter kit, you don’t have to cover the quarterly minimums until the end of June. That’s four months! And the minimums are $300 a quarter or $100 per month BEFORE your 20% discount. If you’re spending $80 per month before tax and shipping on craft supplies, then you should just join. There is NO obligation to hold workshops, blog, or post on Facebook or Instagram!
- What are you waiting for? Click this link to join my team!
Subscription Information
Subscribe to the February Paper Pumpkin Kit between 11 January 2023 and 10 February 2023 by clicking here!
Note: Supplies may be limited toward the end of the subscription period.
Kit Contents
This kit includes:
- Everything you need to create 9 radiant cards—3 each of 3 designs—and 9 coordinating envelopes.
- A sweet springtime photopolymer stamp set.
- A Mango Melody Stampin’ Spot
- A fun peek-through window scene on each card!
- Cute precut critters and labels, fun raindrop embellishments, and more!
Finished card size: 5-1/2″ x 4-1/4″ (14 x 10.8 cm)
Coordinating Stampin’ Up! colors: Balmy Blue, Cajun Craze, Coastal Cabana, Daffodil Delight, Flirty Flamingo, Mango Melody, Old Olive, Shaded Spruce.
As a bonus, I post my 5-8 alternatives for each kit. So, if you don’t like the kit as designed, I’ll show you how to use the same supplies to make different cards or projects.
Don’t forget! This kit perfectly coordinates with the Rain or Shine Suite Collection (item number: 160556).
Why subscribe to Paper Pumpkin during Sale-a-bration?
A one-year subscription is $235. And since it’s Sale-a- Bration, you’ll get 4 $50 free rewards or 2 $100 free rewards, or any combination of rewards that equals $200. If you don’t think you’ll like the upcoming kit, you can pause for a month. Or, get the kit and check my blog for my alternates!
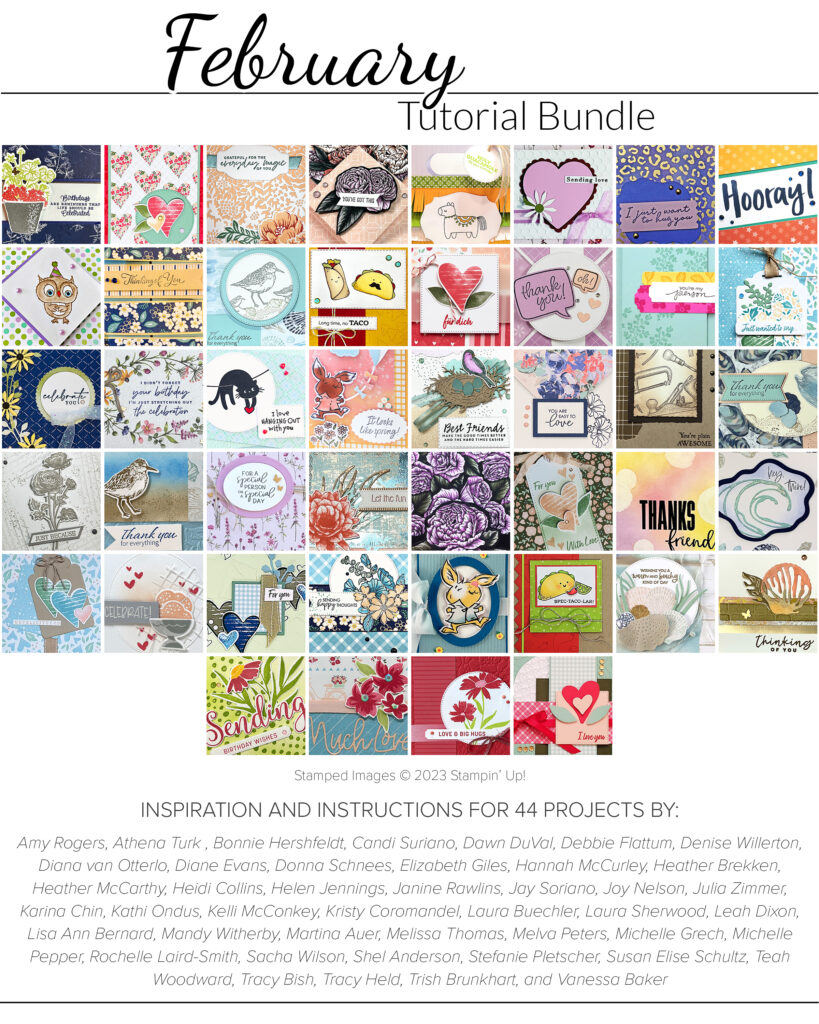
Can you imagine 44 step-by-step tutorials using current Stampin’ Up! products? And it’s yours for a $50 purchase in my online store! And, for the first 10 people who place an order, I will send you the supplies to make my project! It doesn’t get better than that! Plus, you’ll also be able to pick a free Sale-a-bration item which really sweetens the deal.




Your car is beautiful. I may have to use this idea!
Pretty card! I love this bundle too!
Love the clean monchromatic look of this card Candi x
Lovely card!
Thank you, I love your card!
This is a beautiful project with nice clean lines. Lovely! And I may just have to get that die set now…