Today’s project uses the Heron Habitat for a fun in the sun blog hop with Crafty Collaborations. We are a group of international demonstrators who collaborate together on blog hops like this one, monthly tutorials which are available for free with a $50 purchase, virtual catalog launches, and class planners to inspire you and each other to express your creativity.
Today’s Project – Heron Habitat
As I looked at my stamp sets, I found quite a few that would fit this theme. The Sunny Splash Stam Set which I used in this post and the Paradise Palms bundle which I’m using in a future post were the most obvious. And, then Heron Habitat caught my eye and I thought how about the birds having some fun in the sun???
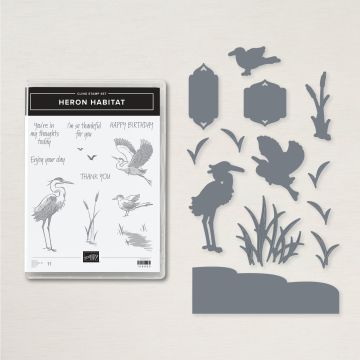
Heron Habitat Bundle
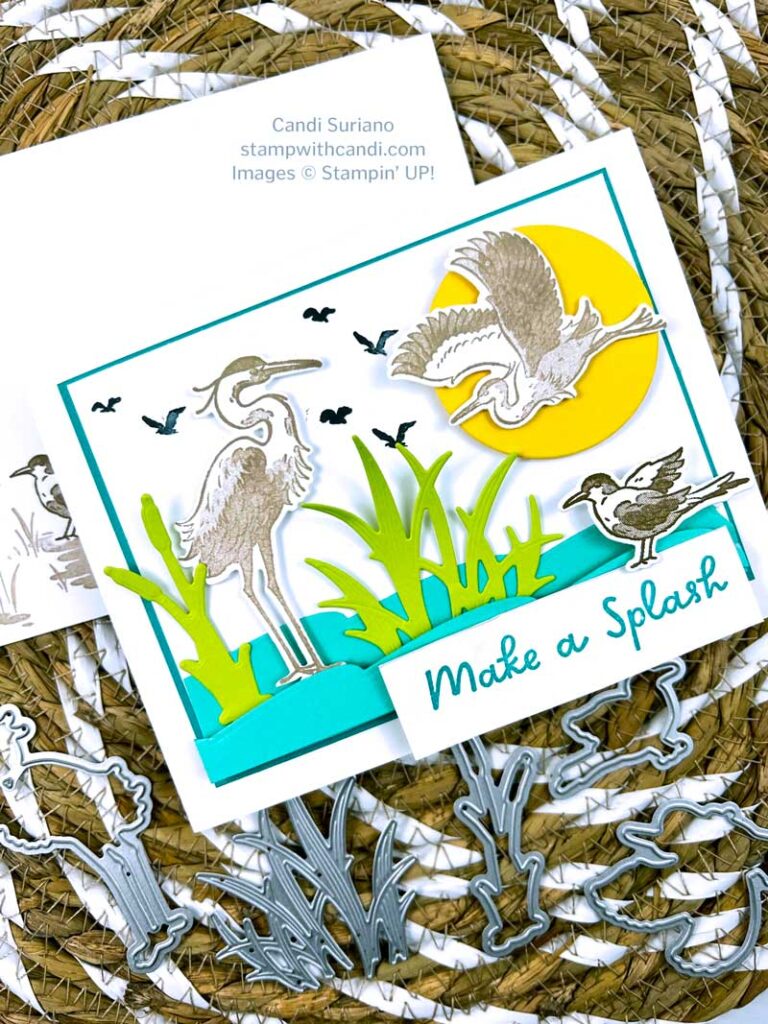
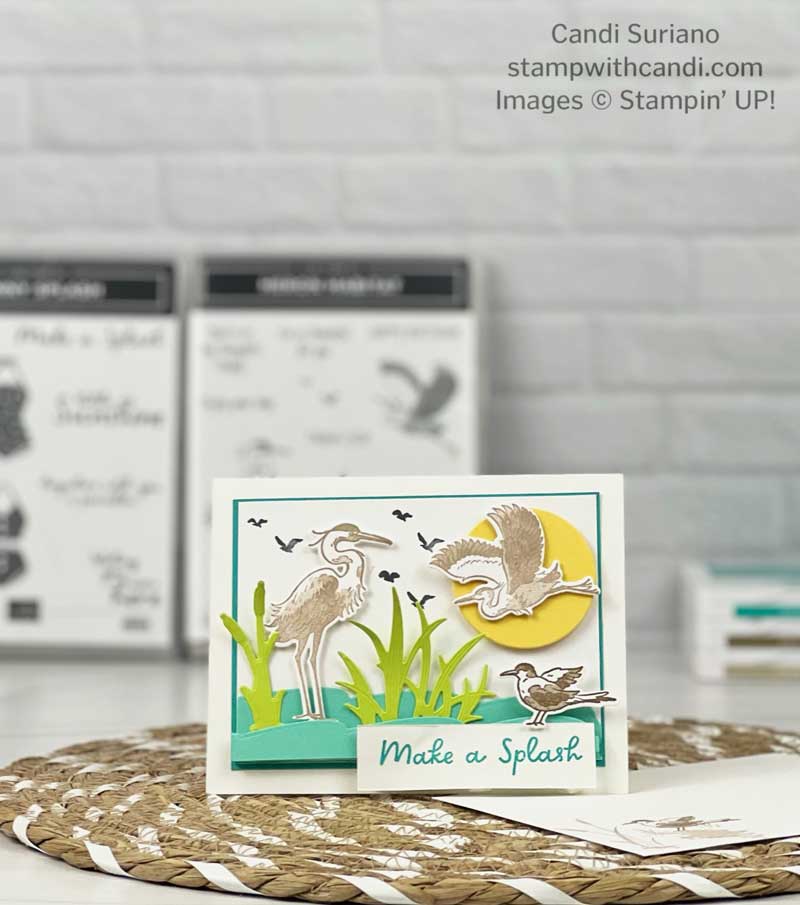
This is a great bundle. Because the Heron Habitat Stamp Set is a Distinktive stamp set, you get gorgeous images with just one color of ink. Of course, you can also watercolor the images or use blends. But for my card, I just used a single color of Crumb Cake for the Herons and Soft Suede for the Royal Tern bird.
However, it’s the dies and colors that make this card fun! The Bermuda Bay waves, the Daffodil Delight Sun, and the Granny Apple Green cattails really make the card pop.
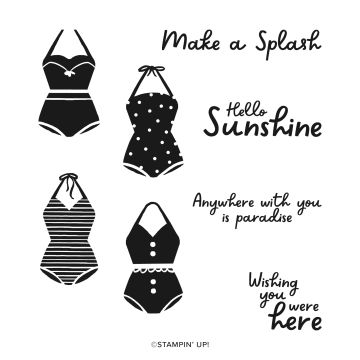
Sunny Splash
I also needed a sentiment that was more in line with Fun in the Sun, and the sentiments in the Heron Habitat bundle, while good, didn’t quite do it for me. But the ‘Make a Splash’ sentiment from the Sunny Splash stamp set sure did! I love it!
Today’s Color Palette – Heron Habitat
As I mentioned above, the Daffodil Delight, Bermuda Bay, and Daffodil Delight really make this card say FUN. And the details on the stamps really stand out in the neutral shades on the birds.
Make the Inside Pretty
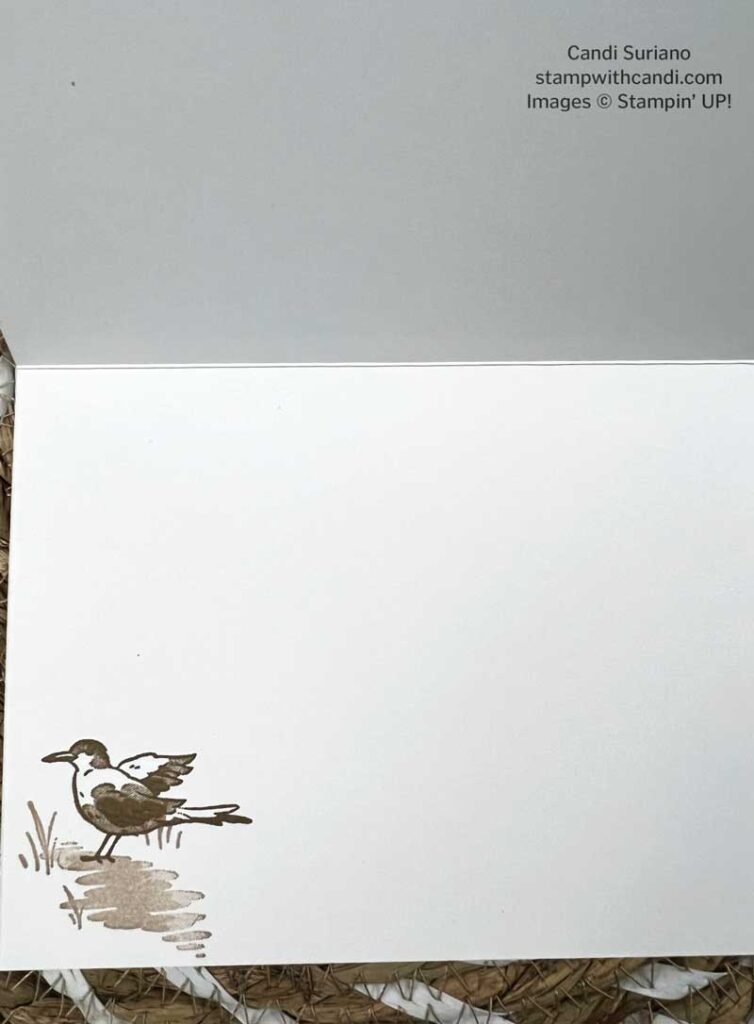
I stamped the Royal Tern using Soft Suede ink and the beach & grass using crumb cake ink. And, I used a masking trick so that the grass didn’t stamp over the bird. First, I stamped the bird on the inside. Then I used the bird die to cut a mask from the new Masking Paper. Then, I put the mask on top of the bird and stamped the beach & grass. I love these new masking sheets. They are so much better than using Post-It Notes which tend to move around if you’re not careful. And, they are the perfect amount of sticky to stay in place, but not so sticky that they pull the ink off.
You really need to try these sheets. I used them at my last in-person class and the ladies were WOWed! We used them to make a flower so that it looks like the leaves are stamped behind the flower. You can see an example in this post. The flower on the front was masked and then the leaves were stamped. When the mask comes off, the leaves look like they’re behind the flower!
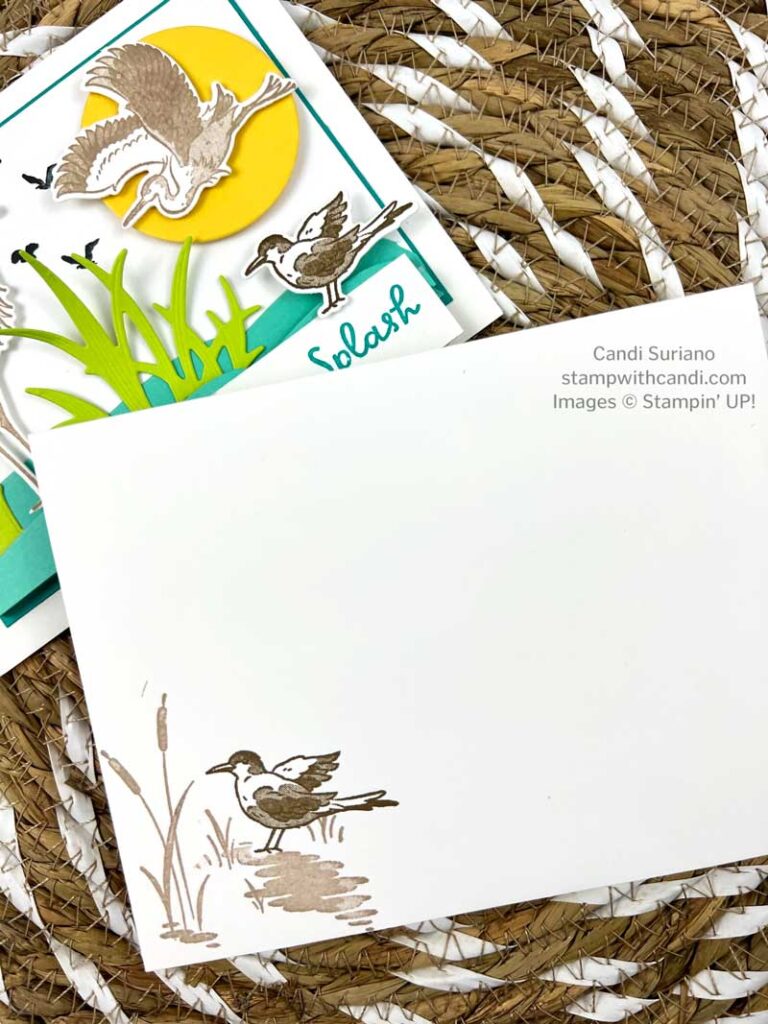
Don’t Forget the Envelope – Heron Habitat
I used the same technique as on the inside, but I added some cattails in Crumb Cake.
You Can Make it too
Make the Base
I started with a Thick Basic White card base cut at 5 1/2″ X 8 1/4″ and scored at 4 1/4″. I topped it with a Bermuda Bay layer cut at 4″ X 5 1/4″. Which was topped with a 5 1/8″ x 3 7/8″ panel of Basic White cardstock on which I built my scene.
Create the Scene
First, I cut two waves using the Heron dies out of Bermuda Bay cardstock. The first wave was adhered directly to the cardstock. The second wave was adhered to the bottom of the first wave using an Adhesive Foam strip. This gave me a place to tuck in the die cuts.
Next, I used the Layering Circles Dies to cut a sun out of Daffodil Delight Cardstock and attached it to the scene using a couple of dimensionals. I only used a few because I wanted some ‘movement’ on the sun as you’d see on the pavement when it’s really, really hot!
Create the Die Cuts
Now that the scene base is done, I stamped the two Herons and the Royal Tern bird and cut them with the dies. I also cut the cattails and beach grass using the Heron dies. Then I started playing with placement. I wanted the in-flight heron to look like she was diving into the water. And I wanted the upright heron to be wading. They were both attached with dimensionals. Finally, I added the cattails and grass using liquid glue along the bottom and tucking them behind the first wave.
I finished the scene by stamping the flying birds using Momento Tuxedo Black ink in the background. You’ll notice that the sky is white. I didn’t want realism, I wanted POP so the sky stayed white.
Finish with the Sentiment
Now, it’s time for the sentiment. And after settling on ‘Make A Splash’, I stamped it on a Basic White rectangle measuring 3″ X 3/4″ using Bermuda Bay ink. Attaching it was a little tricky because of the height of the waves. So, I stacked 3 sets of 3 dimensionals along the bottom of the sentiment and used liquid glue on the part by the wave. I lined up the sentiment with the bottom of the card and let it attach to the wave. Finally, I adhered the Royal Tern bird to the sentiment using liquid glue for the feet and two stacked dimensionals on the body.
I hope you enjoyed my card today as much as I did making it. It really is Fun in the Sun using Heron Habitat! Now it’s time to see what the other Crafty Collaborators have in store to inspire you. So, grab a beverage, sit back and relax, and enjoy the hop! You’re sure to find a lot of inspiration.
Did you know it’s Summer Sale-a-bration where every $50 purchase earns you free product? Click on the image below to see all the details!



Very nice. Great masculine card.
So creative. I love the mix of stamps.
Great card Candi, love your bright colour palette x
Love your bright colors! Great card!