Today’s blog hop focuses on cardstock and I’m sure you’ll find some interesting tips as you hop along. I’m focusing on how to cut cardstock. When I was a new stamper, I had no idea how to cut my cardstock. Sure, I knew how to cut the bases, but layers really stumped me. I hope today’s post, helps you if you struggle.
How to Cut CardStock Bases
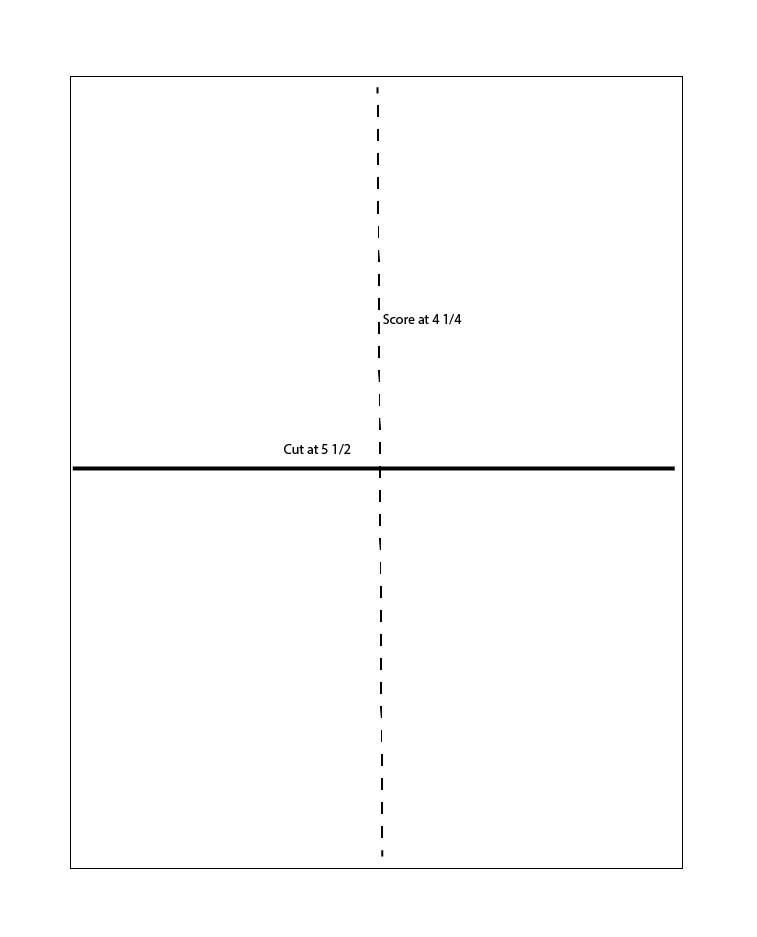
The image above shows one way to cut a card base. Cut an 8 1/2″ X 11″ piece of cardstock at 5 1/2″ along the 11″ side. This is my preferred way to cut because the cards tend to stand up better and most of my cards end up on display. After you cut, you’ll score each piece at 4 1/4″ to make it easy to fold in half. TIP: If you want to save a little time you can score before you cut.
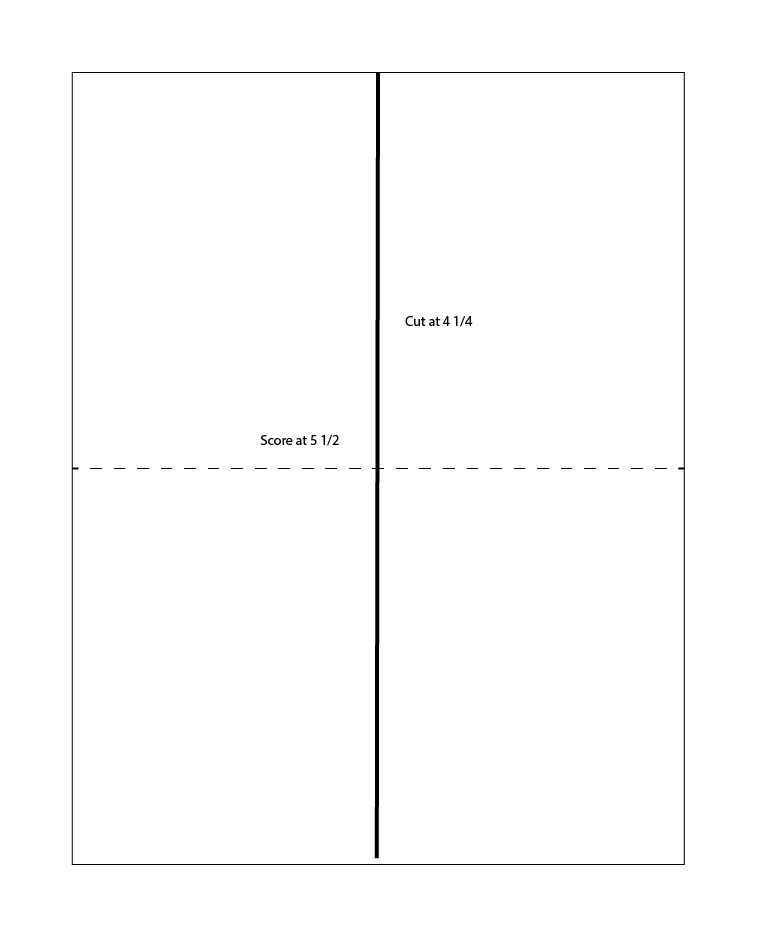
This image shows the other way to cut a card base. Cut 8 1/2″ X 11″ piece of cardstock at 4 1/4″ along the 8 1/2″ side. After cutting, score each piece at 5 1/2″. This makes it easier to fold in half. TIP: If you want to save a little time you can score before you cut.
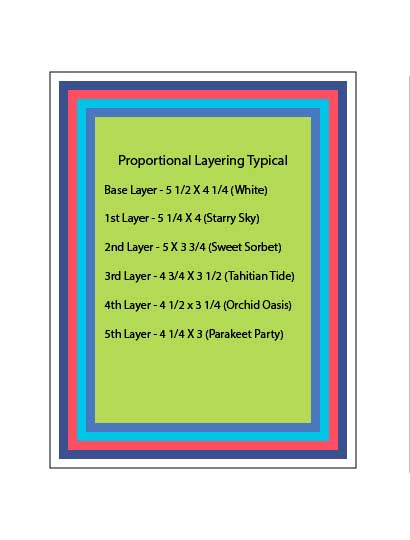
Layering – 1/8″
Eighth-inch layering is the most common layering. Each layer is 1/4″ less than the preceding layer. As you can see in the picture, the first ‘layer’ is the card base and is 5 1/s” X 4 1/4″. The next layer is 5 1/4″ X 4″. It’s 1/4″ less than the preceding layer in both directions. This is especially easy for beginners because it’s more forgiving of ‘crookedness’.
Sixteenth Inch Layering
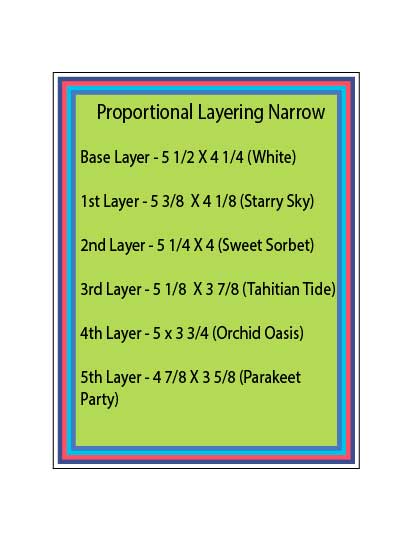
As you can see, this layering is much thinner. Each layer is 1/8″ smaller than the preceding layer. The base layer is the standard card size (US) at 4 1/4″ X 5 1/2″. The next layer is 1/8″ less at 5 3/8″ X 4 1/8″. This gives a narrow layer. With this layer, your cuts must be exact and straight. There’s no room for forgiveness.
Framed Layering
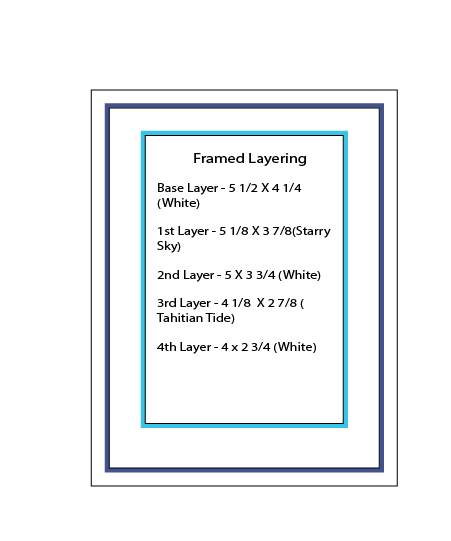
I love this layering and use it often. The first layer’s dimensions are eighth-inch layers. The second layer is a sixteenth-inch layer. This makes the frame. I typically emboss this layer to give it some dimension. Then the next layer (the 3rd), is proportionally smaller and mats the focal image. The final layer is the focal image and is a sixteenth-inch layer. Notice how the focal image looks like it’s framed?
How I Cut My Cardstock
When I started making cards, I cut the cardstock as I needed it. A few years back I decided to precut my cardstock and that made a huge difference in my designs. It makes it so easy to try out different layers because I just open my drawer and pick a pre-cut panel.
Whenever I open a new package of cardstock, I immediately cut it. I cut two sheets into 4 1/8″ X 5 3/8″ pieces which give me 8 pieces of sixteenth-inch layers. Then I cut four sheets into 4″ X 5 1/4″ pieces which give me 16 pieces of eight-inch layers. I take 8 sheets and cut them into card bases. This leaves 10 uncut sheets which I can cut into whatever cuts I’ve run out of.
So, why do I do this? As I mentioned above, it spurs my creativity. I may have an idea for a color scheme that didn’t quite look like it did in my head. So, with the pre-cut pieces, I can swap out the card base and the layers with other colors in a flash.
Today’s Project
Now that we have the cardstock tips done, let’s see how I used them on this card.
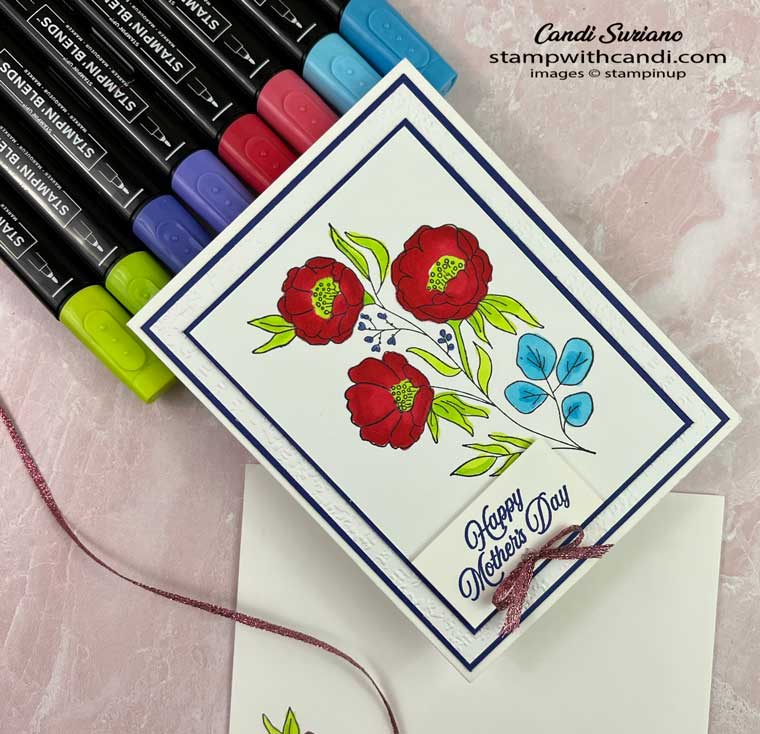
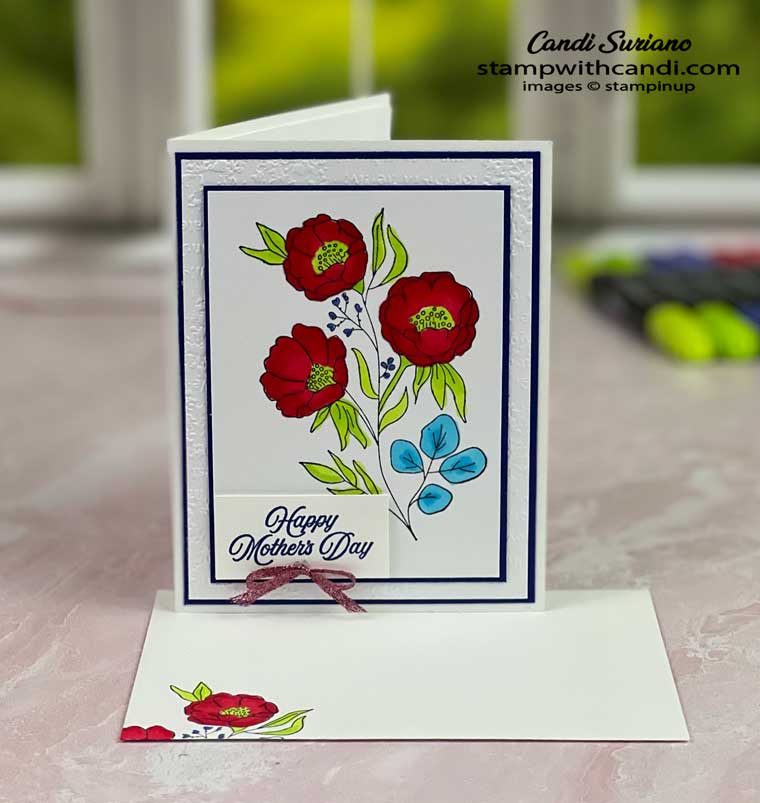
Can you tell that I used framed layering on this card? Now, it doesn’t use the dimensions on the framed layering diagram because I chose a focal image that was too large. But, easily fixed, I just made the focal image layer and the mat a little bigger.
This card is full of sneak peeks from the 2022-2023 Annual Catalog. The stamp set is called Fresh Cut flowers and was on my wish list from the start. I love the open lines that allow for coloring. After a hard day of designing software and being perfectly logical and precise, it’s so relaxing to come home and color!
And speaking of coloring, I used 4 of the new In Colors on this card. Parakeet Party, Sweet Sorbet, Tahitian Tide, and Orchid Oasis work so well together! The 5th In Color, Starry Sky, is used for the layers.
The ribbon is also new and is very sparkly and is available in every In Color.
As you can see, I used the Timeworn Type 3D embossing folder to add some dimension to the layer. Finally, the sentiment is from Celebrating You which is one of my favorite sentiment sets. It has a sentiment for almost every occasion in a variety of fonts.
Make the Inside Pretty
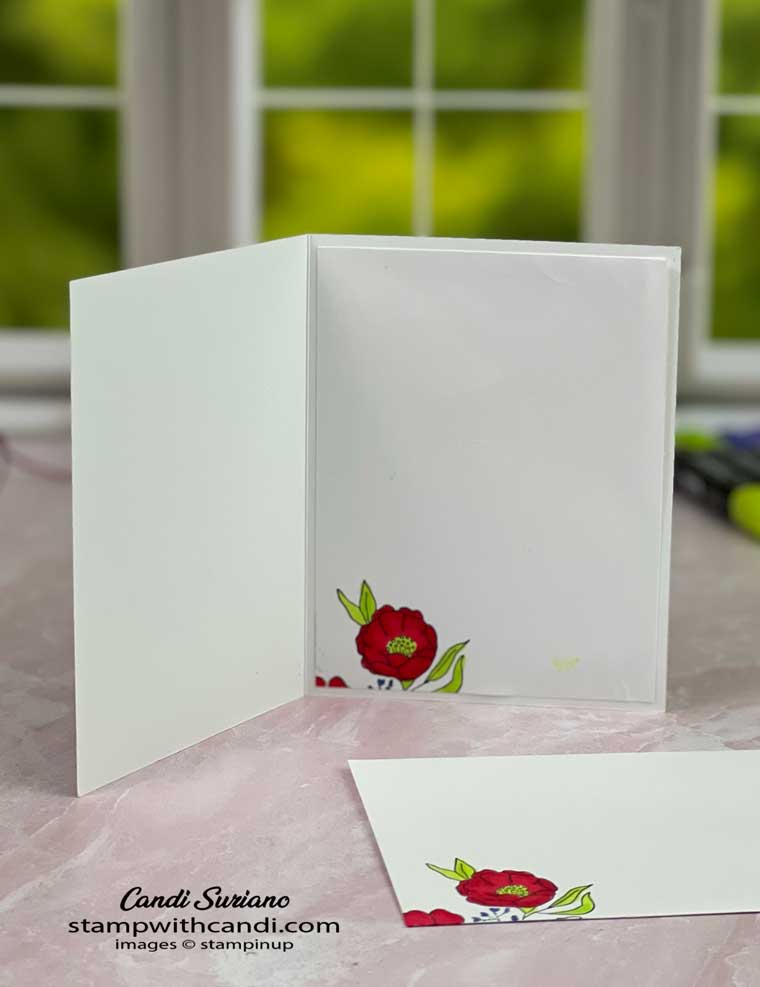
I stamped a partial image on a Basic White panel before coloring it. Since blends tend to bleed through, I always stamp and color on a separate panel so the back of the card stays clean.
Don’t Forget the envelope
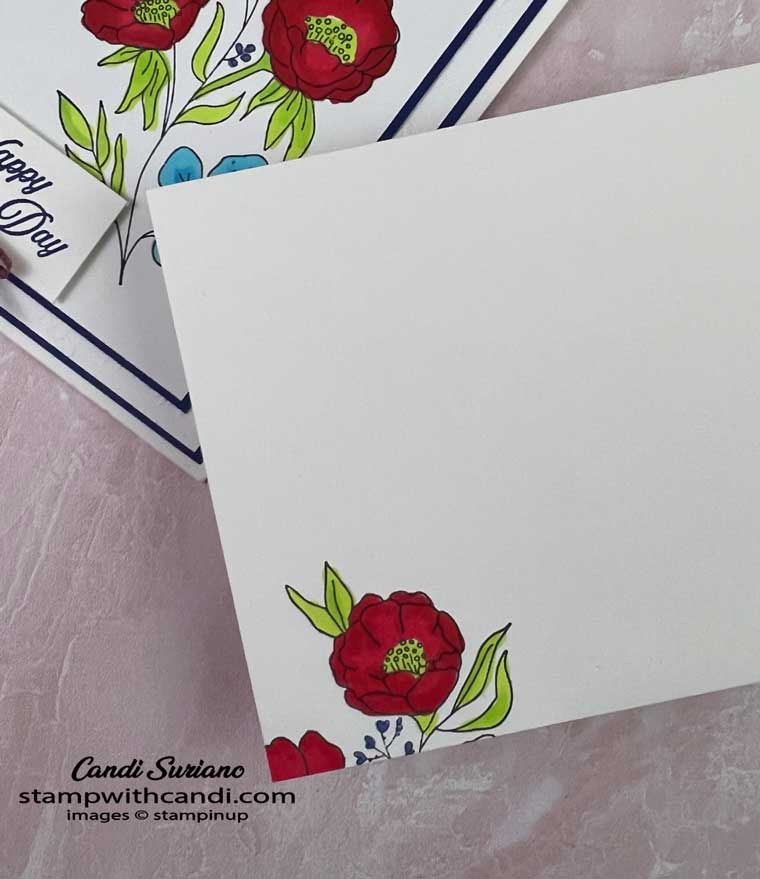
I used the same flower for the envelope front. My tip here is to slip a piece of scrap paper inside the envelope under where you’re coloring it. This prevents bleeding through to the envelope back.
That wraps up my tips on How To Cut Cardstock. Now it’s time to grab a beverage and hop along to the other sites to see more cardstock ideas.
I hope you’ve learned something today and how I put my tips into action. I can’t put a supply list at the end of the post because the products I used are new. Once the catalog goes live, stop back and I’ll have updated the post with the product list.
Need a new annual catalog? Email me at candi@stampwithcandi.com and I’ll pop one in the mail along with a little surprise.


Candi, This is awesome. I always tell people to cut their cardstock this way. What a wonderful card. So colourful.
Awesome tips for cutting cardstock! I have not ever precut mine, but you’ve talked me into it!
Great information!
What a great blog post Candi, such clear instructions on how to get the best out of our gorgeous cardstock x
Great step by step and visual tips on cutting card stock. A definite teachable moment for all paper crafters!
Thanks for you sneak peak at the new products. I loved the way you walked us through the cutting, sizes and showing us them in action Great Blog post!
Beautiful card with this new stamp set!!!
Such a great tip! Saved to my Pinterest for future use. And the card is beautiful!
Pretty card Candi, Thanks for sharing.