Crafty Collaborations
Crafty Collaborations is composed of Stampin’ Up! demonstrators from around the world. Each month we participate in multiple collaborative projects including blog hops, like this one, tutorials, and swaps to inspire all of us in our passion for crafting. Our goal is to create, share, and inspire every crafter to keep our creative energy flowing.
Crafty Collaborations is composed of Stampin’ Up! demonstrators from around the world. Each month we participate in multiple collaborative projects including blog hops, like this one, tutorials, and swaps to inspire all of us in our passion for crafting. Our goal is to create, share, and inspire every crafter to keep our creative energy flowing.
Today’s Hop – Pressure Embossing
Today the Crafty Collaborators are going to show you some amazing cards using embossing folders and pressure, aka put paper in the embossing folder and run it through the Stampin’ Cut & Emboss machine.
Today’s Project
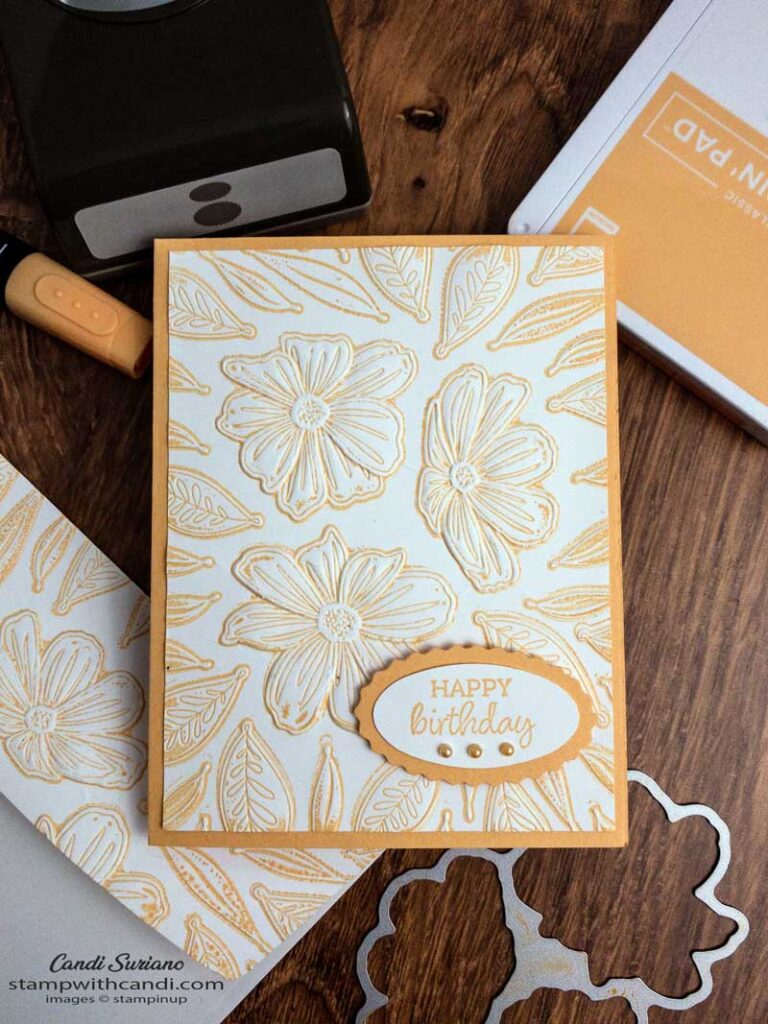
My project uses the Bloom embossing folder which is part of the Art in Bloom bundle. This folder is amazing because it has coordinating dies that allow you to cut and emboss at the same time. But, that’s not what I’m going to show you. Instead, I’m going to show you what it looks like when you ink the inside of the embossing folder. Take a look.
Can you believe that detail and how gorgeous this looks? To recreate this, take a Pale Papaya ink pad and rub it on the inside of the embossing folder. Make sure you put it on the side that has the Stampin’ Up! logo. Then, gently lay your paper on top o the inked side. Close the folder and run it through the Cut & Emboss. That’s all there is to it! Because this is a 3D folder with lots of detail, the ink gets in the crevices and the result is this!
I finished the card by mounting it on a Pale Papaya card base. I stamped the Happy Birthday sentiment from Oval Occasions on Basic White using Pale Papaya ink. Then I punched it using the Double Oval Punch. Finally, I layered it on a Pale Papaya scalloped oval and popped it onto the card front using dimensionals. To finish off the card, I colored Basic Pearls with the Dark Pale Papaya Blends.
Make the Inside Pretty
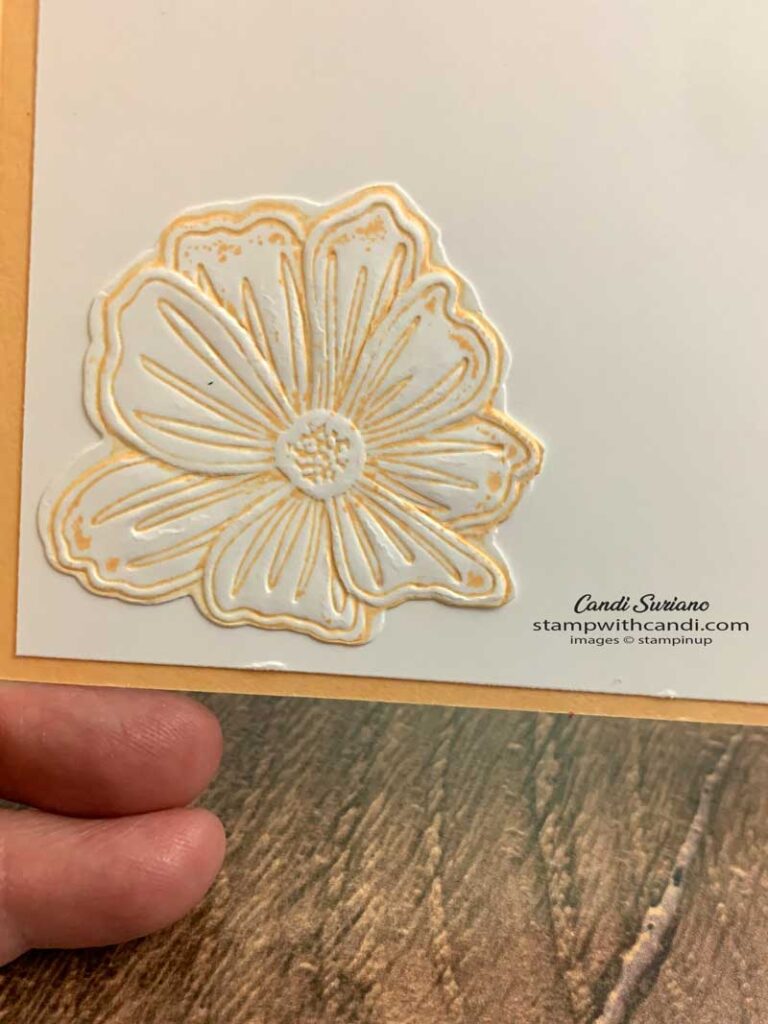
For the inside, I inked up the folder again, added paper, and ran it through the Cut & Emboss. Then I cut out the flowers using the dies. Finally, I glued one of them to a Basic White layer which I attached to the inside of the card.
Don’t Forget the envelope
For the envelope, I inked the folder and then put the envelope flag in the folder and ran it through the Cut & Emboss. As you can see from the first photo, this is a WOW envelope!
Now it’s time for some more collaborative fun. Grab a beverage, sit back and enjoy the hop! You should find some awesome ideas and inspiration as others share their projects made with the Waves of the Ocean suite.
If you’d like to try to recreate this card, you can find a list of the products I used at the end of this post. Need a demonstrator or a catalog? Drop me a line and I’ll put one in the mail. And, f you ever have any questions, please feel free to comment or email me. And, don’t forget to Pin this post so you can find it again!


Great idea! Love your card!
Love this technique, thanks for sharing!
Hi Candi, I love your card. It has an impressive impact and is so easy to make. Thank you for sharing