Crafty Collaborations
Crafty Collaborations is composed of Stampin’ Up! demonstrators from around the world. Each month we participate in multiple collaborative projects including blog hops, like this one, tutorials, and swaps to inspire all of us in our passion for crafting. Our goal is to create, share, and inspire every crafter to keep our creative energy flowing.
Today’s Project
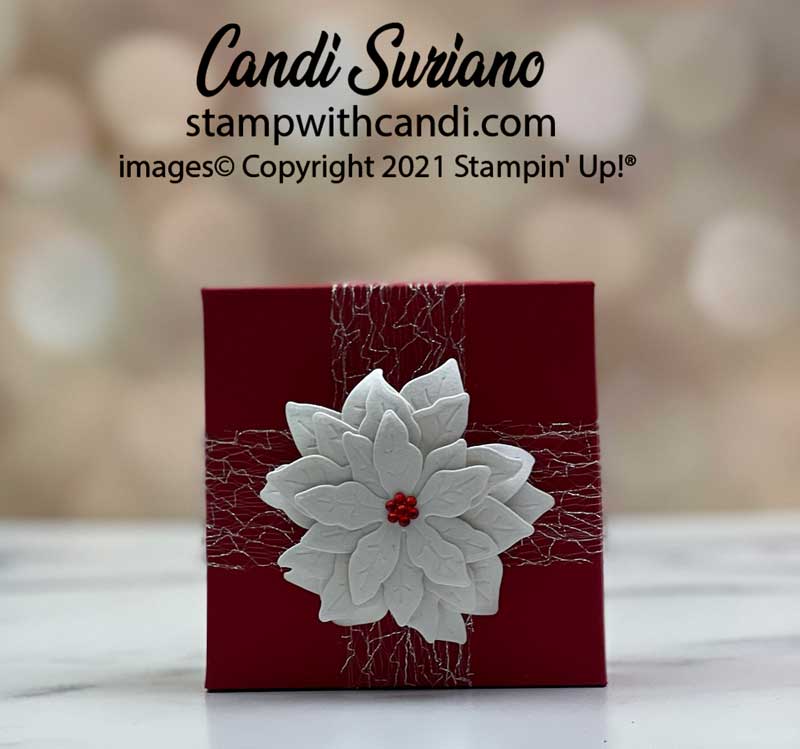
For today’s project, I chose to make a box which I topped with a Poinsettia made from the Poinsettia Dies and the Snowy White Velvet Sheets from the July-December Mini-Catalog. I love to make my own boxes. Once you learn the ‘trick’, they are very easy.
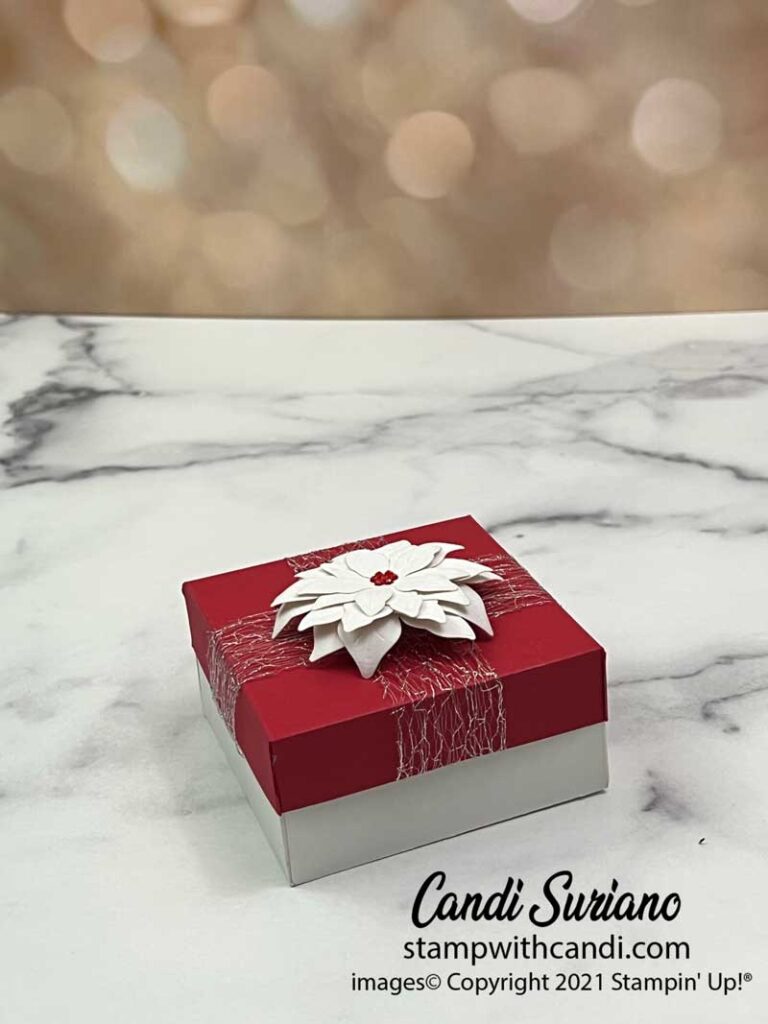
This box measures 4 x 4 which is a nice size for jewelry, some special chocolates, a keepsake Christmas ornament. Well, you get the idea. I made the bottom taller than the top to give it a striped effect.
The bottom of the box uses a 6″ x 6″ piece of cardstock scored at 2″ on all four sides. Fold on the score lines and crease with a bone folder. On two opposite sides cut up to the scoreline on the two small tabs. On the outside, put tear n tape on the 4 small tabs. Then fold and press to get a tight seal.
The top is a 5 1/16″ x 5 1/16″ piece of cardstock scored at 1″ on all four sides. And this illustrates the ‘trick’. The top must be 1/16 of an inch bigger than the bottom (excluding the sides) so that it fits! Fold on the score lines and crease with a bone folder. On two opposite sides cut up to the scoreline on the two small tabs. On the outside, put tear n tape on the 4 small tabs. Then fold and press to get a tight seal.
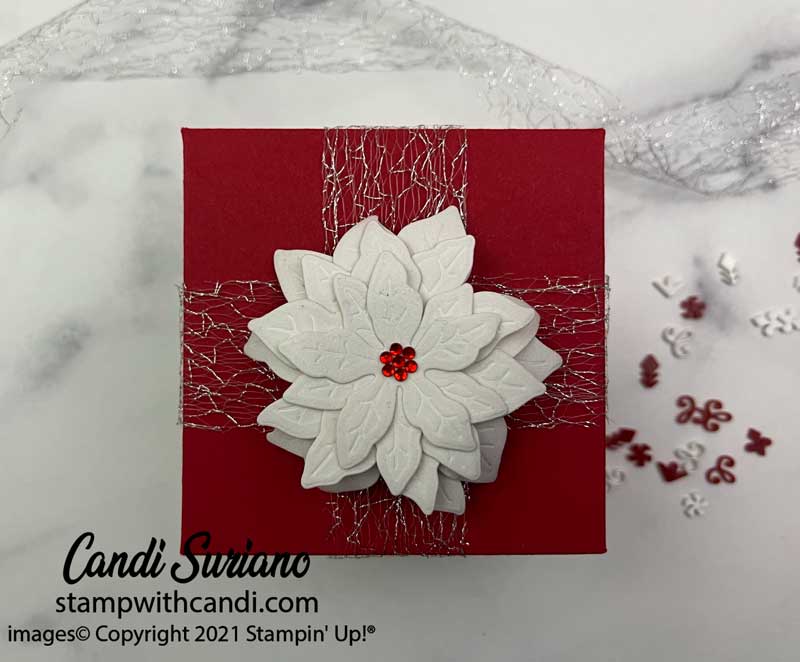
To decorate the box, I used the Metallic Mesh ribbon which is glued to the inside of the box top. I topped it off with a poinsettia made using the poinsettia dies. I cut two of each die from the Snowy White Velvet Sheets and glued them together using liquid glue. Before gluing, I curled each petal under using a bone folder. Then I used the stylus end of the Take Your Pick Tool to ‘stir’ the middle of each petal. This is best done on a soft surface like the Piercing Mat or the Photopolymer mat from the Stamparatus. This makes the leaves pop up and give more dimension to the flower. I attached the flower to the box top using a stamp of dimensionals so the flower pops up.
Finally, I added red rhinestones to the middle of the Poinsettia. If I was going for a more authentic Poinsettia look, I’d have colored Rhinestone Basic Jewels with a Daffodil Delight Dark Blends and put those in the center. But I was going for a monochromatic color scheme, so it has a red center.
Now it’s time for some more collaborative fun. Grab a beverage, sit back and enjoy the hop! You should find some awesome ideas and inspiration as others share their projects made with the Waves of the Ocean suite.
If you’d like to try to recreate this card, you can find a list of the products I used at the end of this post. Need a demonstrator or a catalog? Drop me a line and I’ll put one in the mail. And, f you ever have any questions, please feel free to comment or email me. And, don’t forget to Pin this post so you can find it again!


What a great box!
I jUst love this Thanks for sharing
I love your box! I just happen to have ordered that mesh ribbon in my last order. Now I can play! Thanks for the inspiration, Mary
So elegant!
Beautiful x
Beautiful! I live that ribbon. Poinsettia is so pretty
Gorgeous box and the poinsettia looks so nice
Love it!!!