Crafty Collaborations
Crafty Collaborations is composed of Stampin’ Up! demonstrators from around the world. Each month we participate in multiple collaborative projects including blog hops, like this one, tutorials, and swaps to inspire all of us in our passion for crafting. Our goal is to create, share, and inspire every crafter to keep our creative energy flowing.
Crafty Collaborations is composed of Stampin’ Up! demonstrators from around the world. Each month we participate in multiple collaborative projects including blog hops, like this one, tutorials, and swaps to inspire all of us in our passion for crafting. Our goal is to create, share, and inspire every crafter to keep our creative energy flowing.
Today’s Project – Christmas in July
Today’s hop is all about Christmas in July. Christmas is my most favorite time of year! I decorate every room in my house, have multiple trees, and decorate both my front yard and back yard! With all the decorating, I need to get a jump on my Christmas Cards, so starting in July is a good idea.
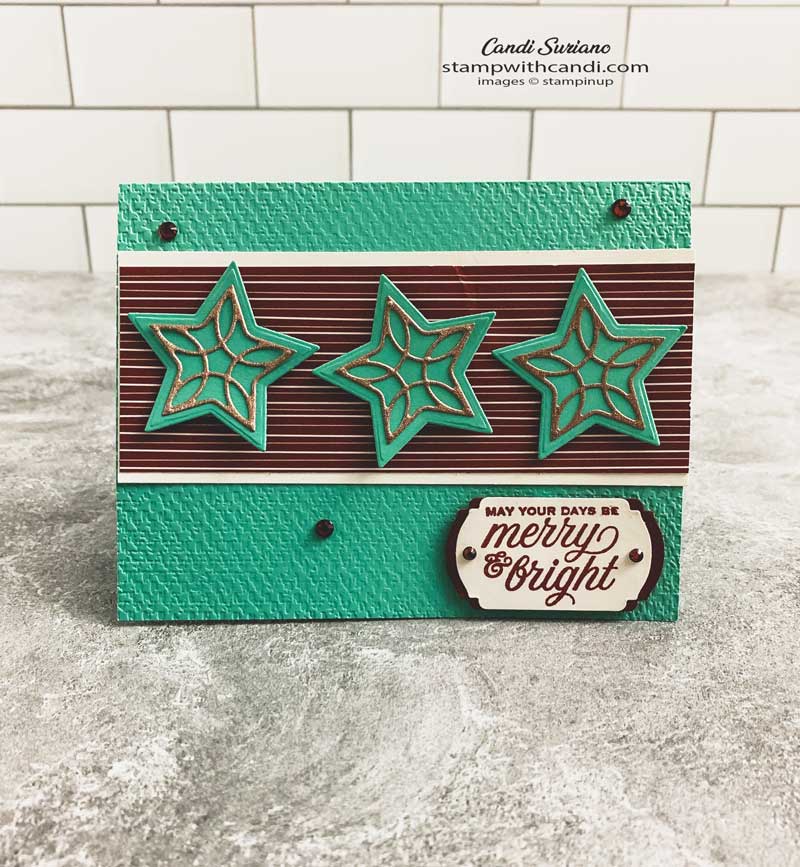
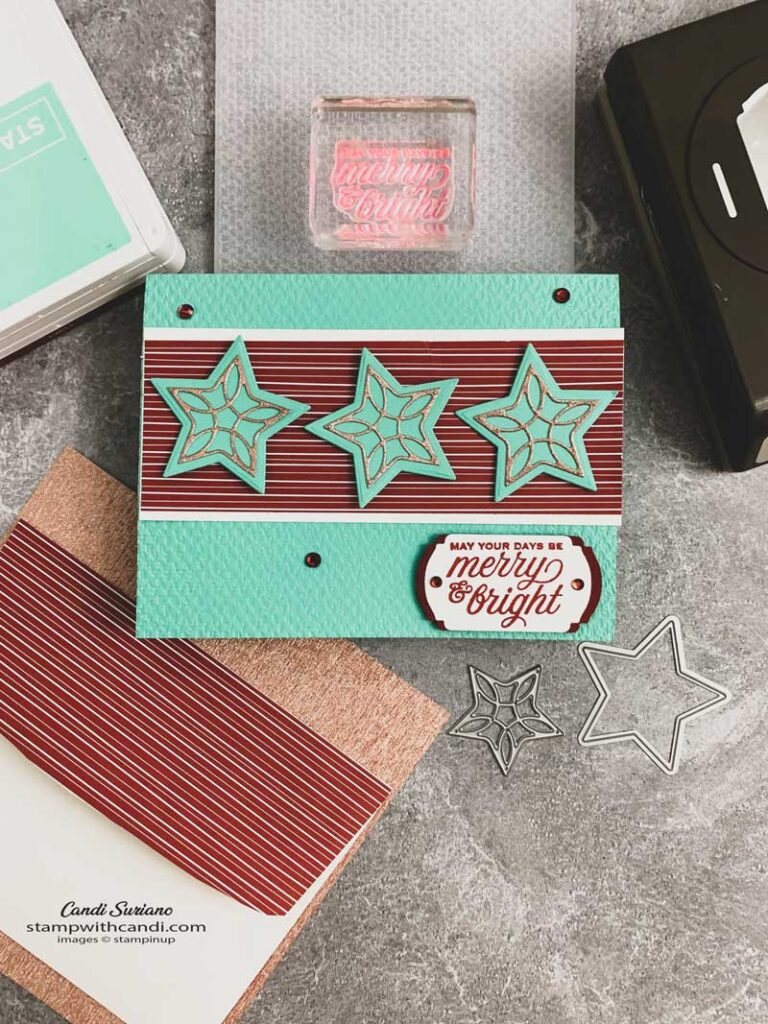
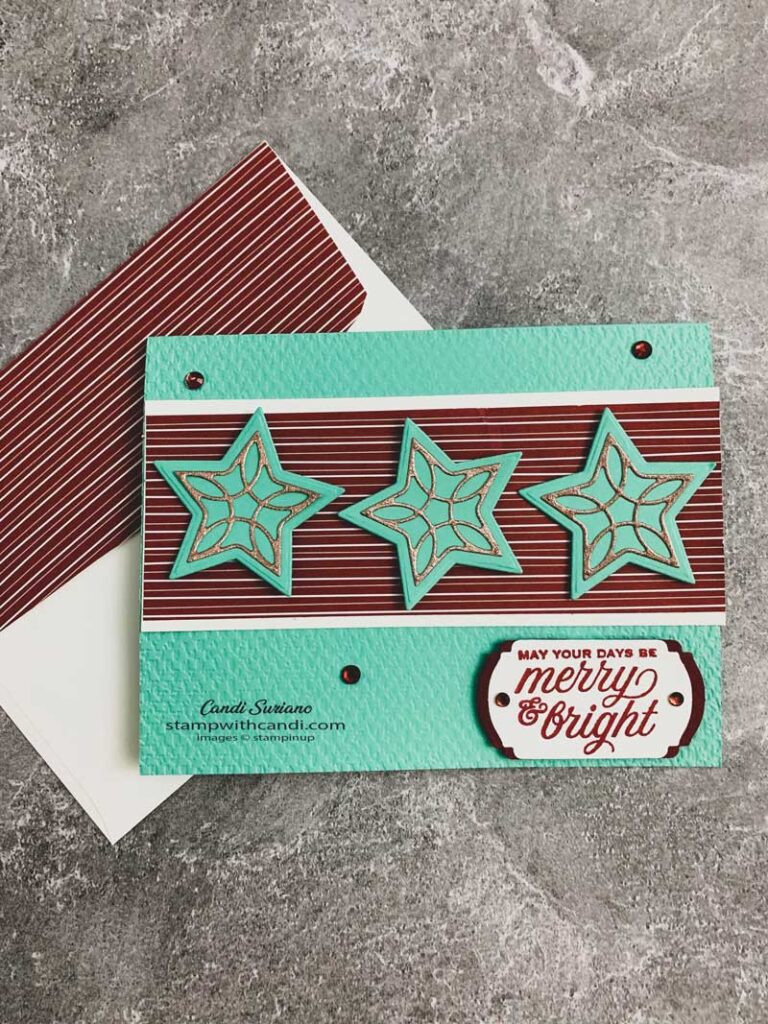
The Tidings & Trim bundle was perfect for this project. Cutting the star trim with the Rose Gold glimmer paper and using unconventional Christmas colors really made this card pop. I live in a 63-year-old MidCentury Modern house, so the blue-green with red vibes fit it to a T.
The Coastal Cabana card base was embossed with the Tasteful Textile 3D embossing folder. This is my go-to folder for adding texture now that the Subtles folder has retired.
I used a sheet of the Tidings of Christmas Designer Series Paper for the front, inside, and envelope flap. One 6×6 sheet worked out perfectly! I framed the front piece of DSP with a Basic White layer to set it off from the Coastal Cabana base.
The sentiment was stamped with Cherry Cobbler ink and then punched with the Label Me Fancy punch. I punched a second piece of Cherry Cobbler, cut it in half, then glued it on either end of the sentiment to give it some pop.
I finished the card front with the Cherry Cobbler sequins from the Holiday Sequins embellishments.
Today’s Color Palette
Make the Inside Pretty
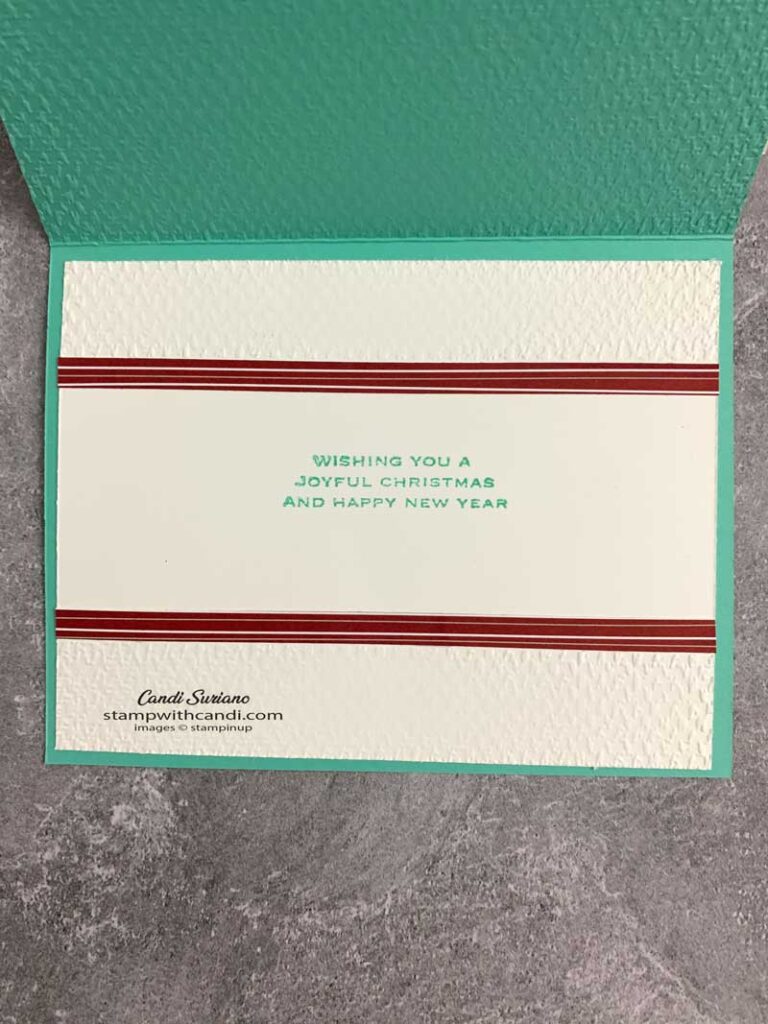
I went all out on the inside – the picture doesn’t do it justice. Using the same Tasteful Textiles 3D embossing folder that I used on the front, I embossed the top and bottom of a piece of Basic White cardstock. Then I glued a strip of the DSP above and below the embossing. Finally, stamping the sentiment in Coastal Caban ink finished off the inside.
Don’t Forget The Envelope
I used the same DSP on the envelope flap. I cut a piece 6″ X 2 1/4″ DSP, glued it to the flap, then trimmed it to fit.
Now it’s time for some more collaborative fun. Grab a beverage, sit back and enjoy the hop! You should find some awesome ideas and inspiration as others share their projects made with the Waves of the Ocean suite.
If you’d like to try to recreate this card, you can find a list of the products I used at the end of this post. Need a demonstrator or a catalog? Drop me a line and I’ll put one in the mail. And, f you ever have any questions, please feel free to comment or email me. And, don’t forget to Pin this post so you can find it again!


Great card a wow what an inside/ Thanks for sharing
Very pretty! Thanks for sharing
Lovely card x
Beautiful inside and out! I would never have thought to add embossing to the inside of a card but it looks great. Thanks for sharing
Cute card!
great tie in with the inside and envelope as well!
Great card, thanks for sharing x