Hi all. Today I’m in another blog hop with Stamping with Friends. We are a group of demonstrators around the world who love to share our creative ideas with you to spark your creativity. Today’s theme is using products from the 2022-2023 Annual Catalog that are retiring. I’m mixing that theme with a tutorial on using dies as stencils. Stencils which Stampin’ Up! calls masks, are a trendy thing in the cardmaking world. And, although Stampin’ Up! doesn’t have a lot of stencils they have a ton of dies that make great stencils.
Today’s Project – Using Dies as Stencils
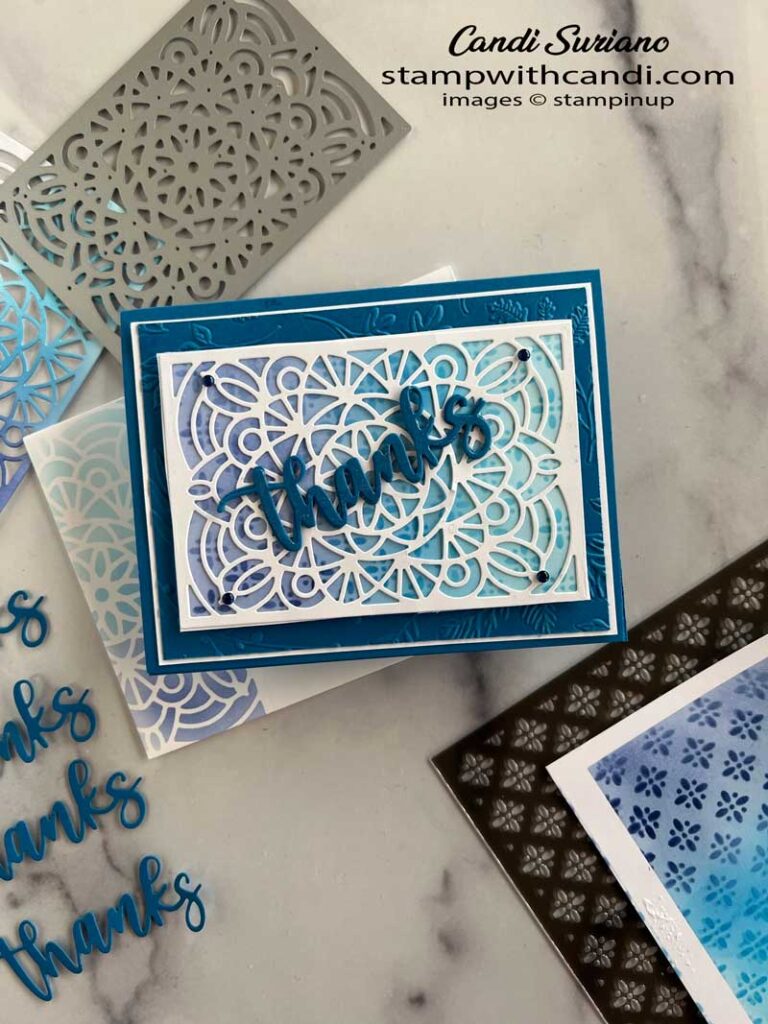
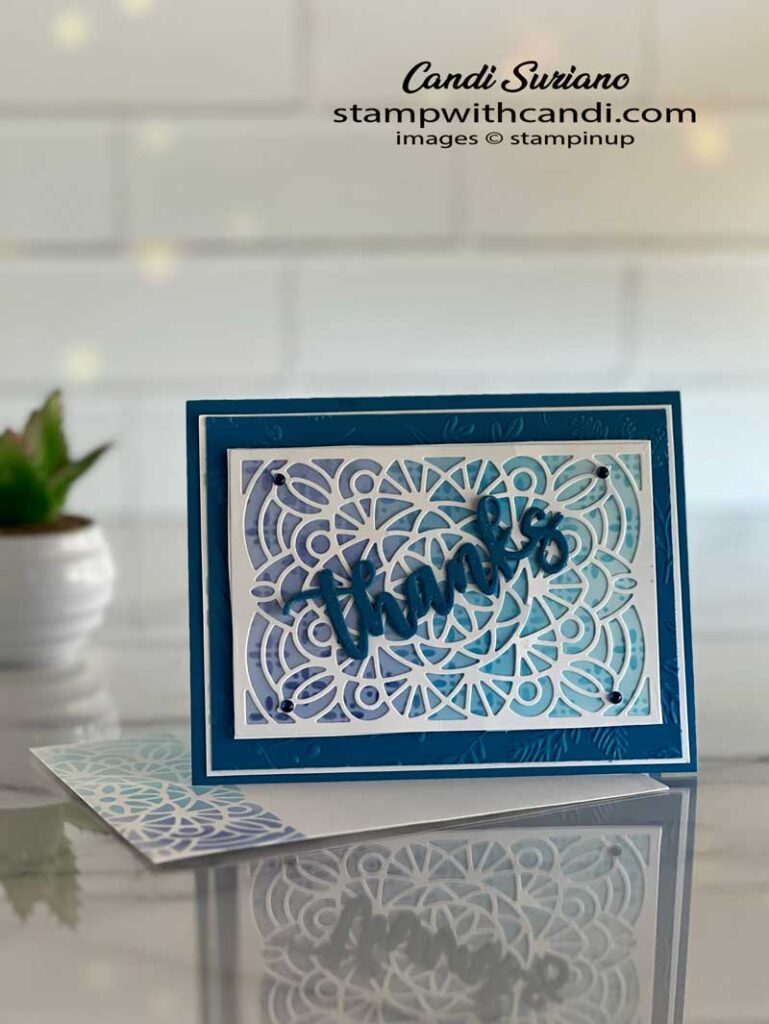
I just realized that today’s project doesn’t use any stamps! It’s all about the tools. To create this card, I started by cutting out the large die from the Artisans Additions dies. Then I put the frame on a piece of Basic White cardstock and colored it using blending brushes.
After coloring it, I put the mask from the Artisan Mix decorative masks on top and then added more color using the blending brushes. This gives the pattern you can see in the image above. To finish off the card front, I adhered the die cut on top of the stenciled image, trimmed it to the frame side, and then mounted it on the card front using dimensionals.
Before mounting the stenciled image on the card, I embossed the Pacific Point layer with the Twigs & Sprigs hybrid embossing folder to get some texture and then mounted that on the Basic White layer which I attached to the card front.
For the sentiment, I cut out 4 of them using the Amazing Thanks dies. The dies are too thin to put dimensionals on. But, I wanted some dimension so I glued the four die cuts together before attaching on top of the die cut.
Although the card looked good as is, I wanted a little bling. So I added 4 Milky Dots in a blue color and colored the sentiment using Wink of Stella.
Today’s Color Palette
In addition to using the retired Artisan Additions and Amazing Thanks dies, I wanted to use a retiring color. I never really used much Pacific Point, but now that it’s leaving, I know I’ll miss it. It looks so pretty with Tahitian Tide. Since I was going for an ombre effect, I needed another blue. I did a test using Night of Navy and Starry Sky. As you can see, Starry Sky won.
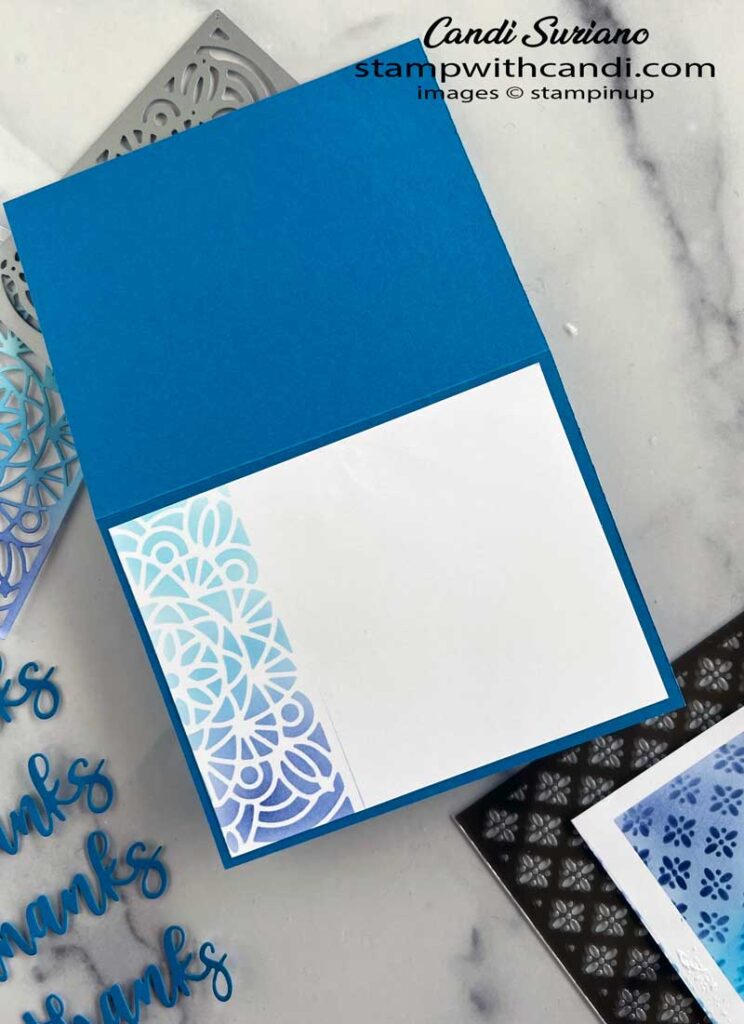
Make The Inside Pretty
Don’t Forget the Envelope
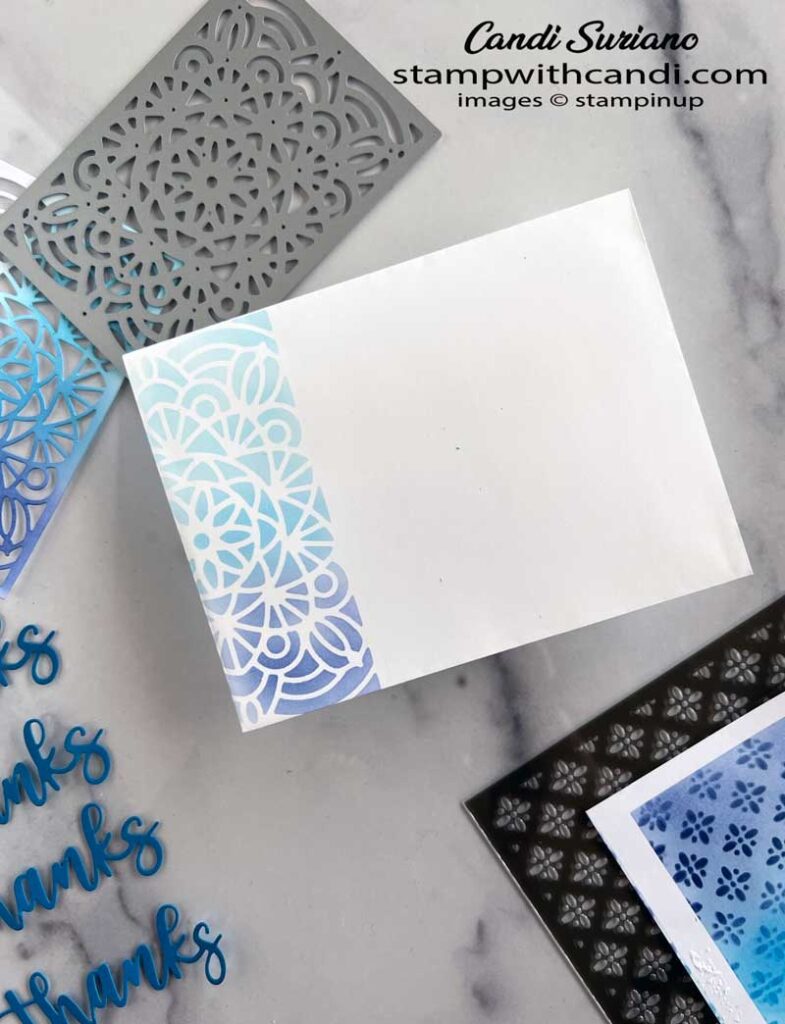
The envelope shows how the die cut was used as a stencil. I put a Basic White die cut on the edge of the Basic White liner. And then colored it with the blending brushes. To keep the rest of the liner clean, I put a piece of paper next to the stencil. You can see on the left top of the image above the stencil with the ink on it.
You can Make it, Too – Using Dies as Stencils
For the envelope, I used the same technique as on the inside liner.
Make the cuts
- Base card (Pacific Point) 8 1/2″ x 5 1/2″. Score at 4 1/4″
- Layer 1 (Basic White) 5 1/4″ x 4 “.
- Layer 2( Pacific Point) 5 1/8″ x 3 7/8″
- Layer 3 (Basic White) 5″ x 3 3/4″ Cut 2.
- Die Cut (Basic White) 5″ x 3 3/4″
- Inside Liner (Basic White) 5 1/4″ x 4″
- Sentiment ( Pacific Point) 5 1/4″ x 4″
Die Cut, Color, and Emboss
- Die cut 4 of the sentiment from Pacific Point card stock. Glue them together using liquid glue.
- Make two of the die-cuts from the Basic White.
- Emboss the Pacific Point layer with the Twigs & Sprigs embossing folder
- Lay the negative of the die cut on Layer 3. Then using Blending Brushes create an ombre using Tahitian Tide, Pacific Point, and Starry Sky ink.
- Lay the Artisan Mix mask on top of the ombre and reapply the ink in the same colors.
- Lay one of the die cuts on the right side of the inside liner. Put a piece of paper next to it so you don’t get ink on the liner. Then use the Blending Brushes to create an ombre using the three ink colors.
- Repeat the above for the envelope front.
Assemble
- Attach the inside liner to the inside.
- Attach the embossed Pacific Point layer to the Basic White layer. Attach to card front.
- Attach the uncolored die cut to the ombre layer. Trim to fit. Attach to card front using dimensionals.
- Attach the sentiment to the card front using liquid glue.
- Color the sentiment with Wink of Stella.
- Add 4 Milky Dots as shown.
Time to Hop
I hope you enjoyed my project and that it inspires you to use a die as a stencil and to also use the Artistic Mix Decorative masks by themselves and with other stencils. Now it’s time to see what the other Friends have in store. So, grab a beverage, sit back and relax, and enjoy the hop!



That is such a cool way to showcase the dies as stencils. Wonderful.
great idea to use the die cut as a stencil. your color blending is beautiful
Oh my goodness Candi, how have I missed these dies, Beautiful card and a great technique x
Love this. great idea. Thanks for your inpsiration