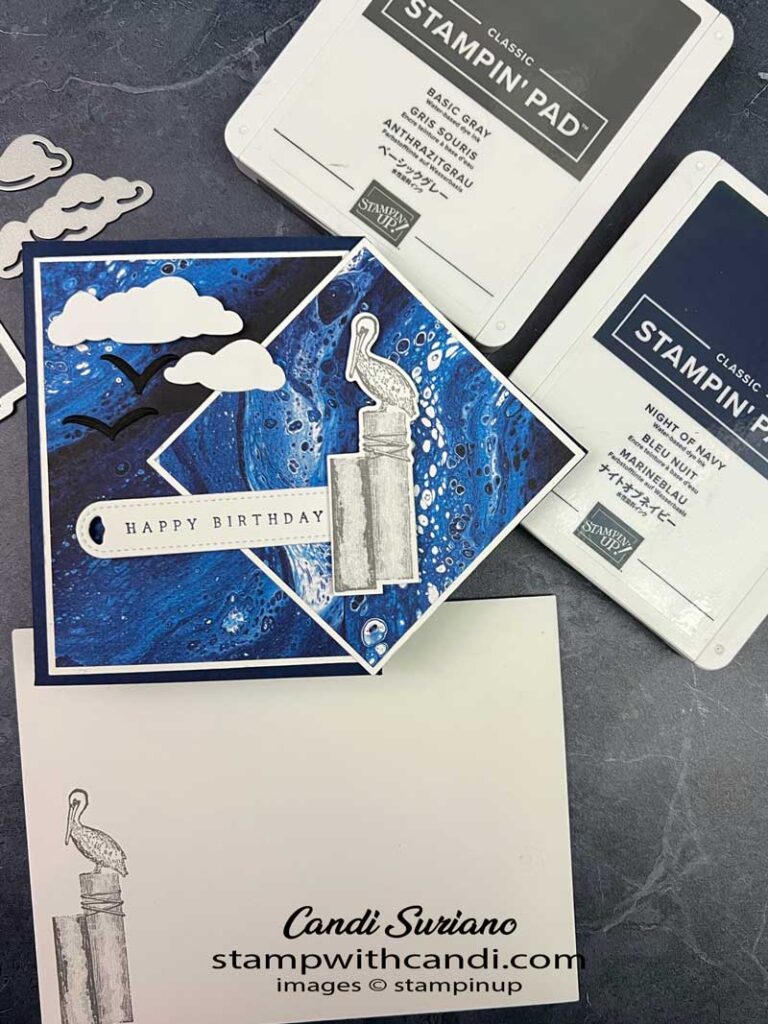
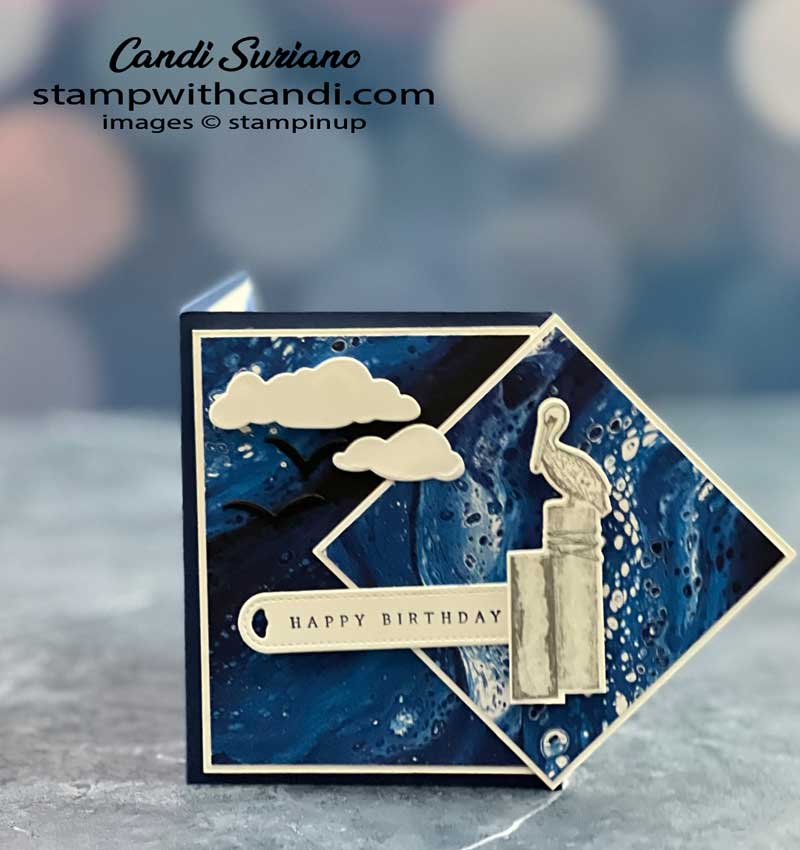
I’m hopping today with Stamping with Friends where our theme is birthday cards with a fun fold. Double fun because who doesn’t need birthday cards and who doesn’t love a fun fold! Actually, it’s quadruple fun because the card is also a masculine card plus a sneak peek of the Waves of the Ocean Suite, available from March 1 to May 2, 2022.
Today’s Project
The Waves of the Ocean suite is amazing. First, let’s talk about the paper which is the highlight of the card. The artist used a pour technique where blobs of ink are put in a tight pattern on a canvas and then moved around by air. This technique produces random patterns of paint and bubbles that are reminiscent of the ocean when done in blue tones and just a cool pattern when done in other colors.
The other thing I like about the suite is that its images are perfect for a masculine card. And, it has blue rhinestones and blue foil paper so you can also bling up any projects you make with it.
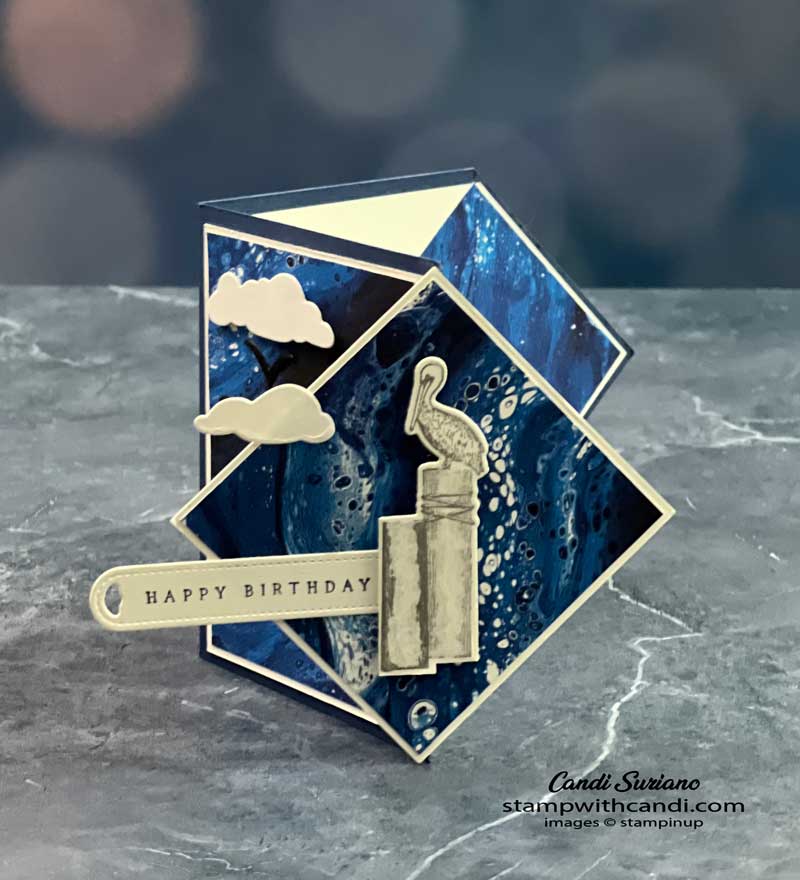
The Diamond Flip card looks hard but is really easy! After you do one, you’ll be hooked on this fold! This card was inspired by a post I saw on France Martin’s blog frenchiestamps.com. Her version used floral images while mine is using ocean images.
Fun Fold CutS
You’ll need the following cuts for this card.
- A base that’s 11″ X 4 1/4″
- A piece of cardstock for the flip that is 3 X 3. This piece should be cardstock, not DSP as part of it is not glued to the base. It can be the same color of the base or a contrasting color to the DSP layer.
- A piece of DSP for the flip that is 2 7/8 ” X 2 7/8″
- A contrasting layer for the front 3″ X 4″
- A piece of DSP for the front which 2 7/8″ X 3 7/8″
- An optional piece of Basic White cardstock for an inside sentiment or a written message which is 3 ” X 4″.
- An optional piece of Basic White cardstock for the insert which is 5 1/4″ x 4″.
- A piece of DSP for the inside diamond which is 2 7/8″ X 2 7/8″
Making the Fun Fold Diamond
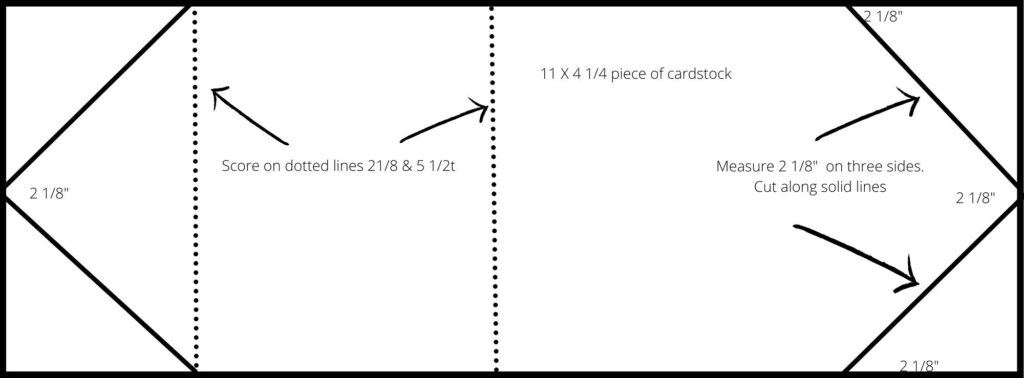
The template above shows the cutting template for the base card. To make the base, take a piece of 11″ X 4 1/4″ piece of cardstock and score it at 2 1/8″ and 5 1/2″.
Next mark off 2 1/8″ (or halfway) on the short side closest to the scoreline. Now, cut from the mark to the scoreline on both sides. This creates the front diamond.
For the inside diamond, mark 2 1/8″ on all 3 sides of the other end of the card. Cut from the mark on the end to each of the marks on the side.
Finally, fold the card on the score lines with the 2 1/8″ fold having a mountain fold and the 5 1/2″ fold having a valley fold.
Fun fold Assembly – Inside
Attach the 3 X 4 Basic White panel to the inside after stamping the sentiment.
Cut the 5 1/4″ X 4″ piece of Basic White card stock by marking 2″ on 3 sides and then cut on the diagonal between two marks. This is the same as the card base just a 1/8″ smaller.
Attach one of the 2 7/8″ X 2 7/8″ pieces of DSP.
Fun Fold Assembly – Front
First, attach the 3″ x 4″ contrasting layer to the front of the card. Then, attach the 2 7/8″ X 2 7/8″ piece of DSP to the front of the card. Next, layer the remaining 2 7/8″ x 2 7/8″ layer on the 3″ X 3″ cardstock layer. Attach this to the ‘flip’ by lining up the point on the flip with the point on the cardstock. Make sure to add the glue to the card base so that you don’t get glue on the inside!
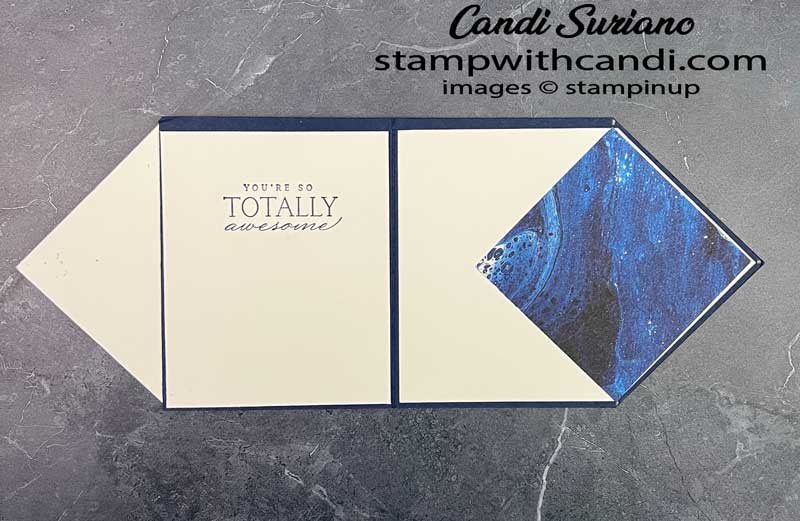
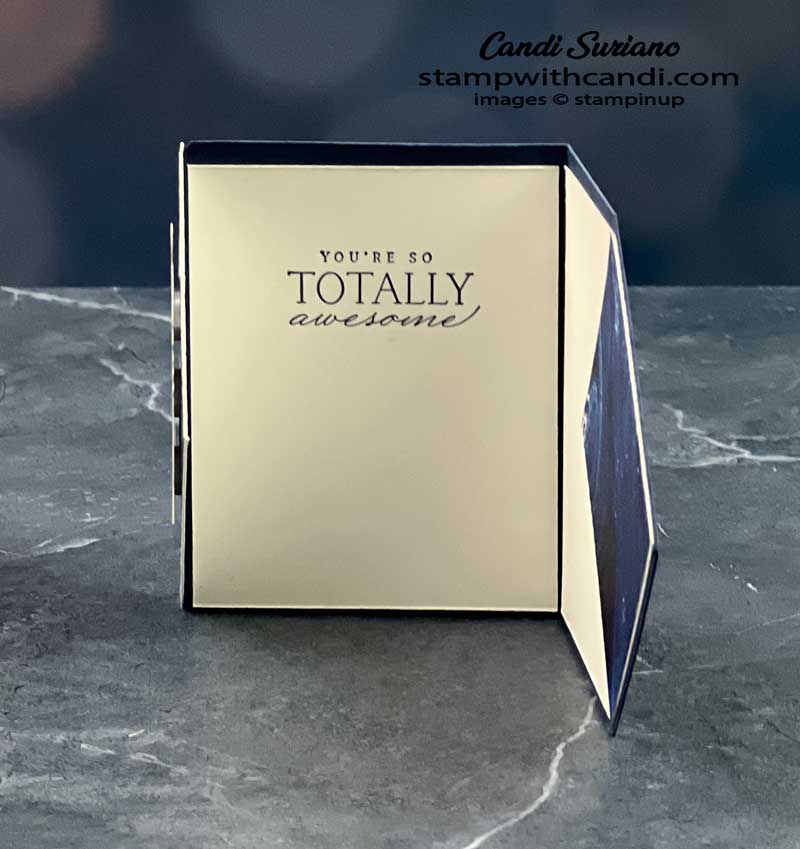
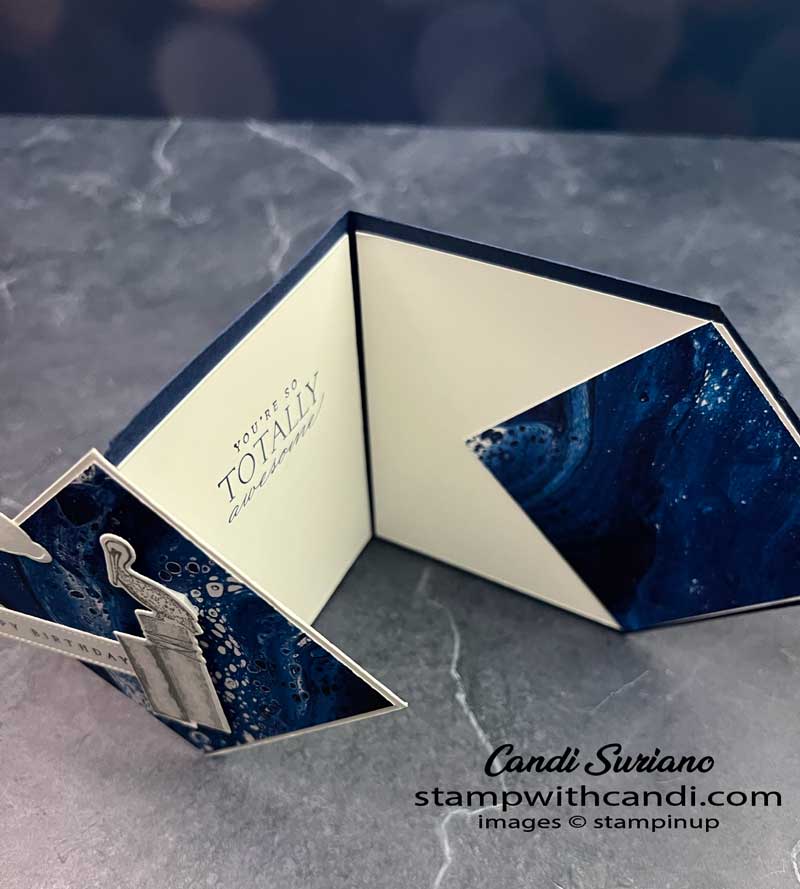
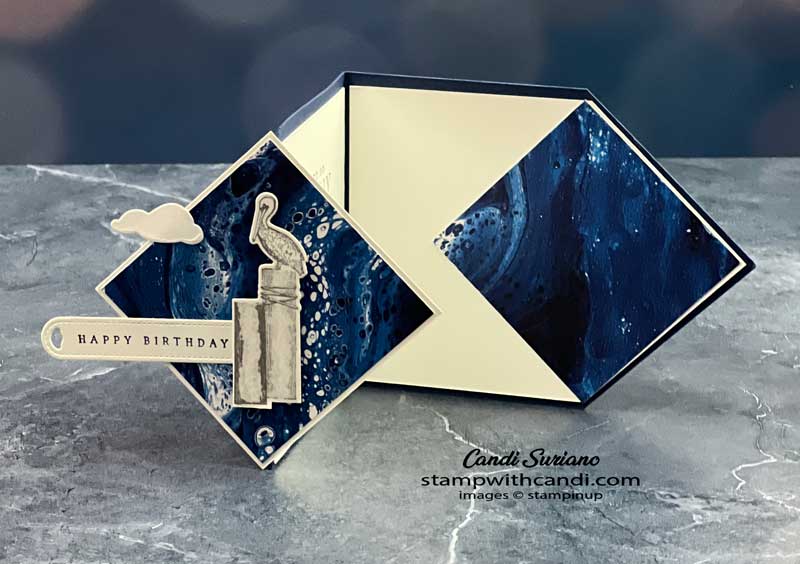
The photo below shows the open card. You can see that it stands up nicely and that the two diamonds ‘match’.
Here is another look at the open card.
Here’s yet a different view of the inside focusing on the sentiment.
Card Front Elements
The pelican on the pilings image was the perfect size for this card front, as was the ‘Happy Birthday’ sentiment. I cut two clouds using the dies from the Waves of the Ocean suite. One is attached to the ‘flip’ part of the card so it hangs off.
Don’t forget the Envelope
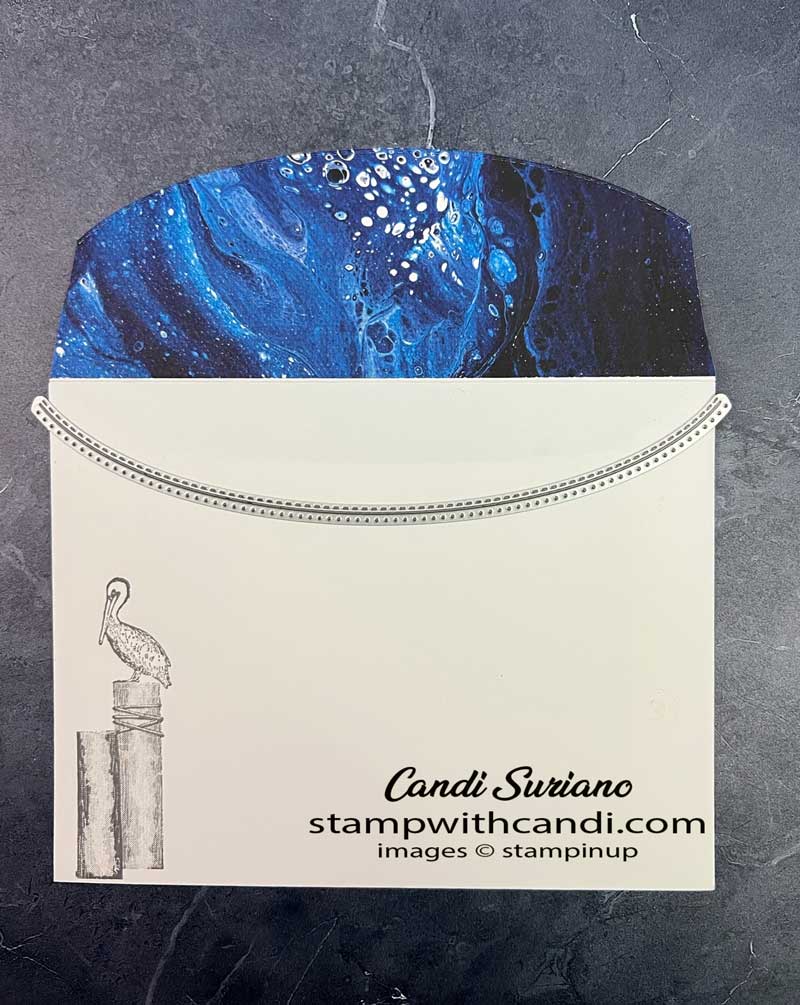
First, what’s amazing to me is that this card fits in a standard envelope! I know it looks too big, but it’s not! I stamped the pelican image on the front and then I did one of my tried and true envelope flap treatments. First I glued a piece of the DSP to the envelope flap. After trimming it to fit, I cut a border using one of the Basic Borders dies.
Hop Along with Stamping With Friends
I hope you enjoyed my Diamond Flip fun fold using the Waves of the Ocean suite. Now it’s time to check the other blogs to find more fun fold birthday cards. Robbie Susan Chandler is next up and I’m sure you’re going to love her project! If you get lost, you can always come back here to see the full list of participating blogs.
Roll Call
Tricia Butts
Betty Bickford
Sue Vine
Karen Egan
Mo Rootes (UK)
Lorraine Tierney
Vickie Littlewood
Candi Suriano
Robbie Susan Chandler-Florida, USA
Carol Brown
Diane Evans
Kristie Wilson
Melva Peters
Kelly Taranto
If you’d like to try to recreate this card, you can find a list of the products I used at the end of this post. Need a demonstrator or a catalog? Drop me a line and I’ll put one in the mail. And, f you ever have any questions, please feel free to comment or email me. And, don’t forget to Pin this post so you can find it again!
Sale-a-Bration is Almost Over
There are only 9 days left before Sale-a-bration is gone. Don’t miss out on your chance to get a free selection from the Sale-a-bration brochure with each $50 purchase. This is one of my favorite of all Sale-a-bration. I wanted one of each of the offerings!
Crafty Collaborations February Tutorial
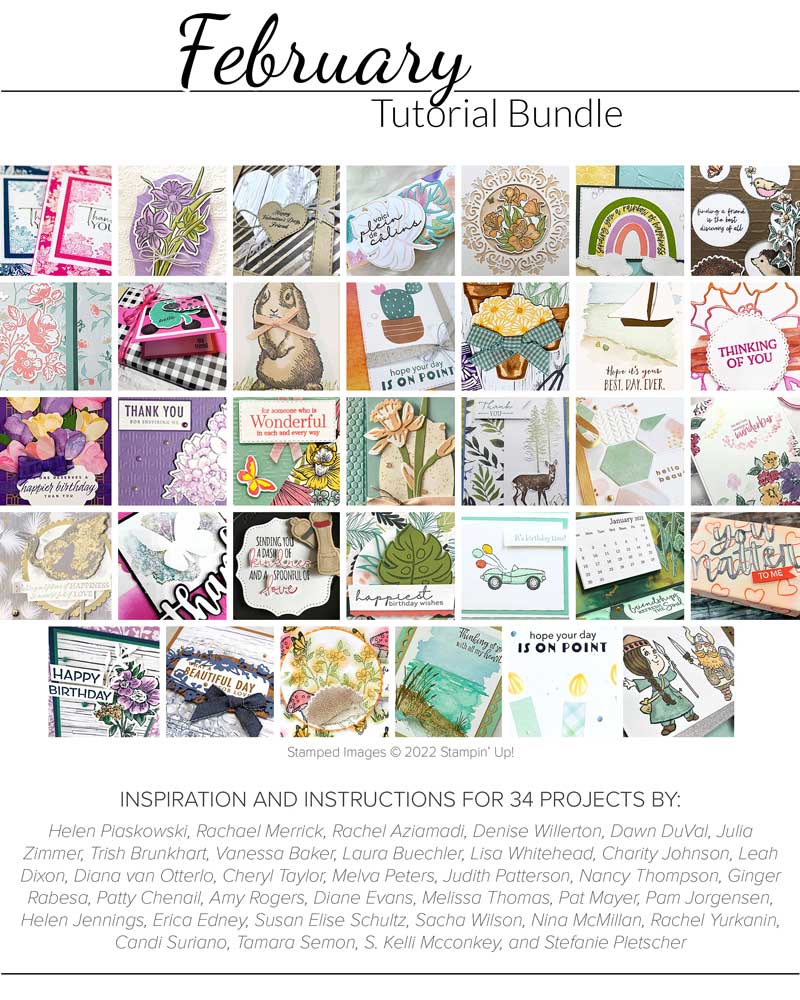
This month’s tutorial is jam-packed with inspiration! Get detailed instructions for 34 awesome products from Crafty Collaborations. This tutorial is free with a $50 purchase. Don’t miss out!




Lovely card x
Such a beautiful card Candi xx
Oh my, so beautiful. Totally love the whole design…dreaming of creating this
Love this fold! Can’t wait to try it!
Beautiful Candi, thankyou
Love, love this card Candi, what a great fun fold x
I love this! I’m going to have to try this!